How to Set Up Automated Facebook Messaging
The Group Collector’s Messages feature automatically sends Facebook messages when members are approved or declined, reducing manual work while maintaining professional, consistent communication.
When Group Collector sends a message, a Facebook Messenger pop-up window opens, and the message is sent through that window to comply with Facebook’s system and safety limits.
It helps you talk to members quickly without having to type the same message repeatedly.
You can also personalize messages using the member’s name, answers, or group details.
What This Feature Is Used For
You can use Facebook Messages to:
- Welcome people when you approve them
- Explain why someone was declined
- Ask questions before approving or declining
- Give clear feedback using Facebook’s “Decline with Feedback” option
- Save time by sending messages automatically
Important:
This feature works with manual actions. It does not when approving members using Auto Approve.
4 Types of Messages
Group Collector supports four types of Facebook messages.
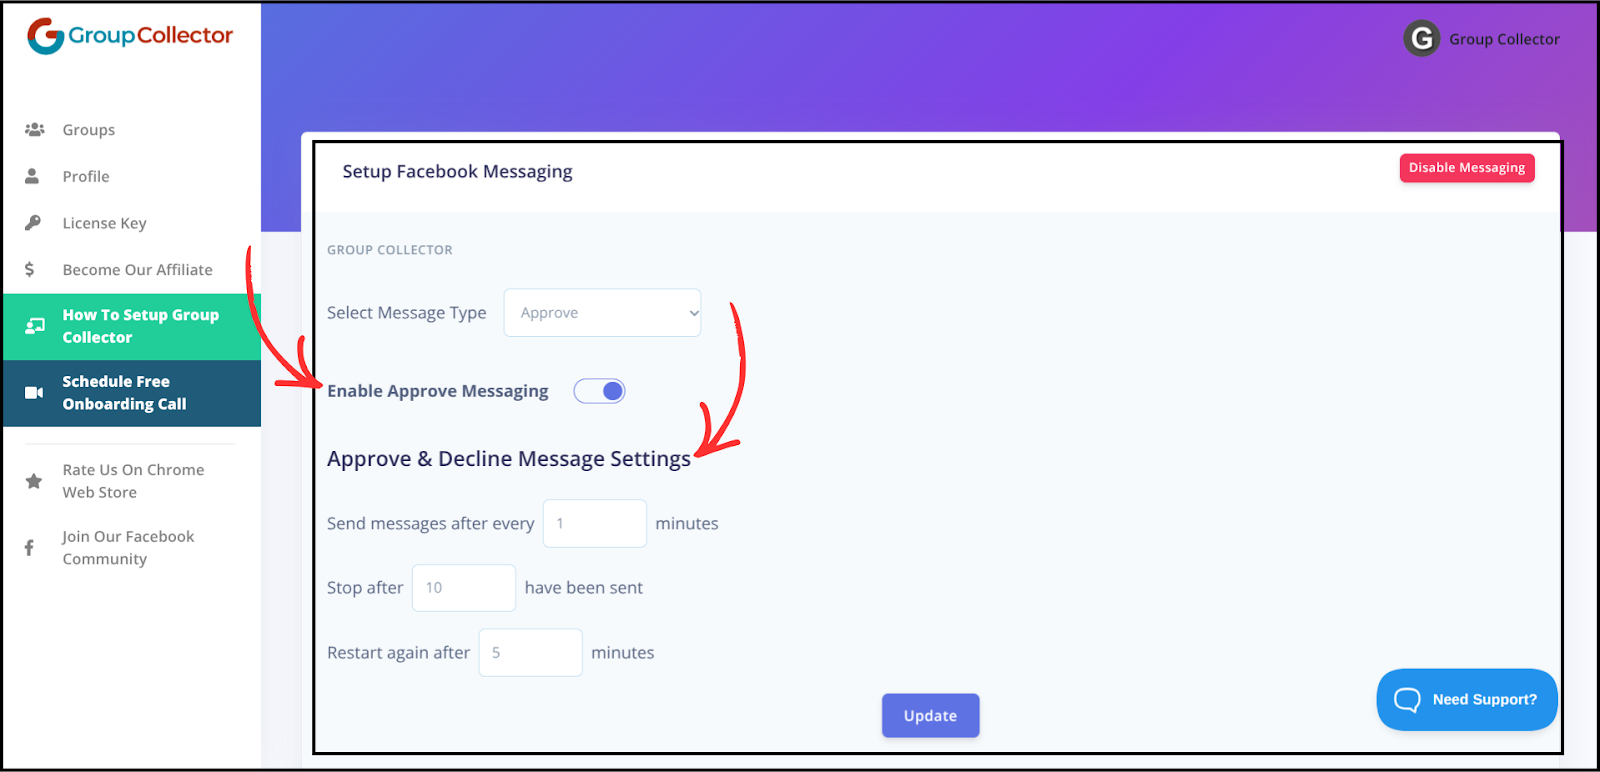
1. Approve Message
This message is sent when you approve a member.
Make sure to enable Approve Messaging
It sends when you:
- Click Approve
- Click Approve All
- Click Approve Selected
Adjust approve & decline message timing, sending limits, and restart intervals to your preference.
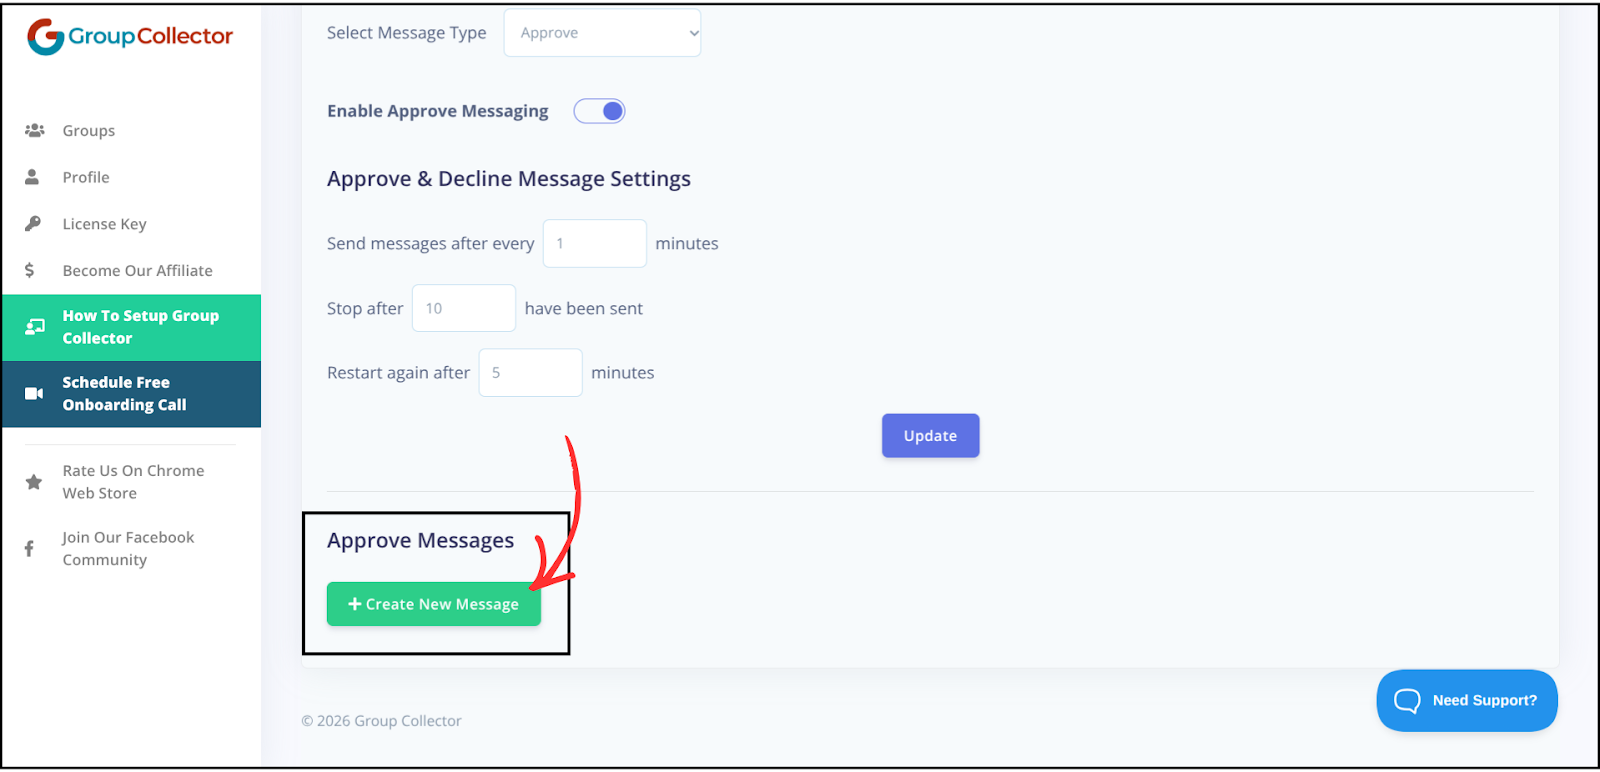
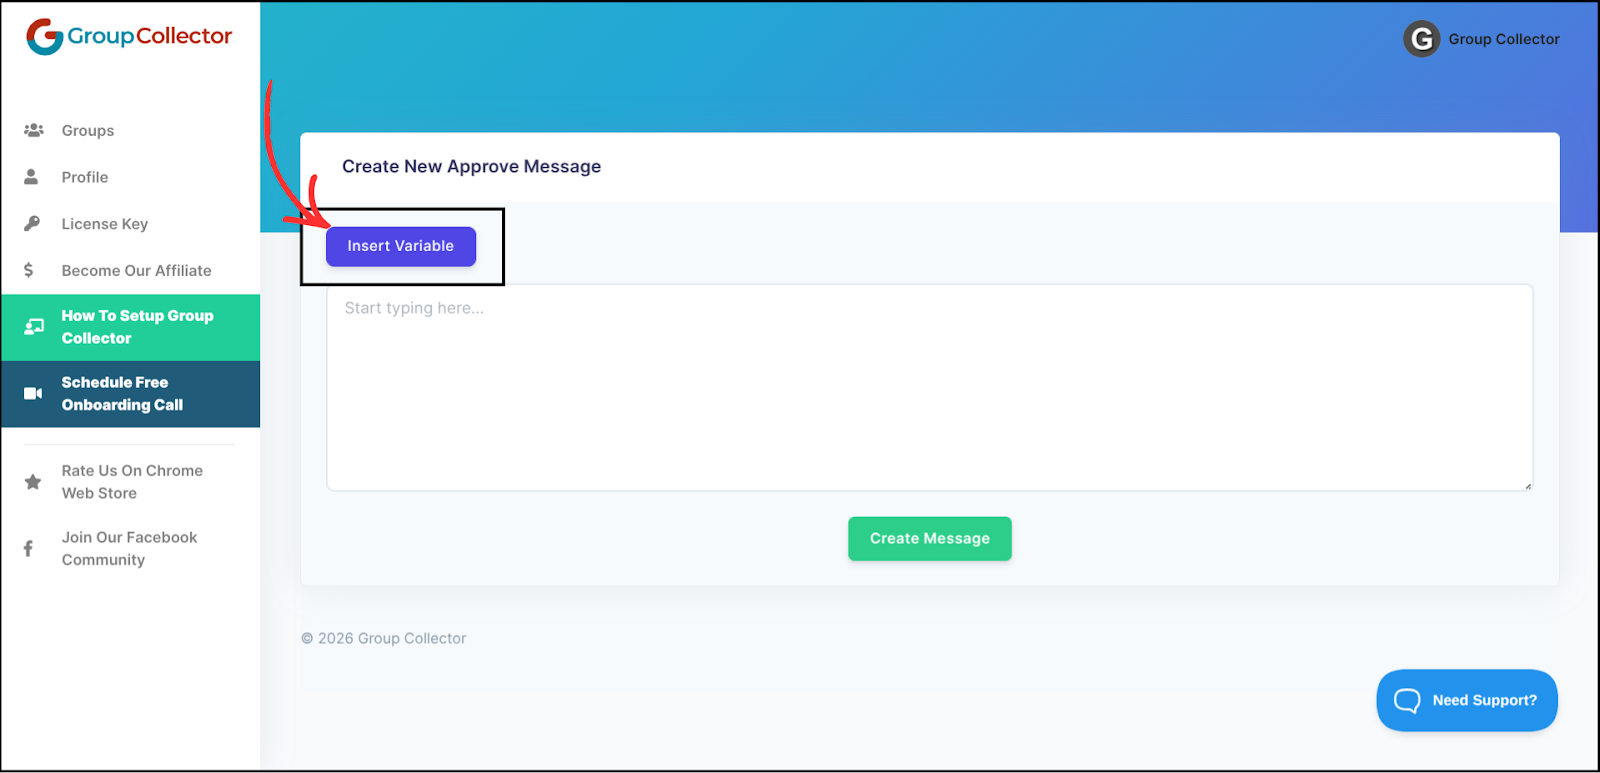
To create a new approve message, click on Create New Message.
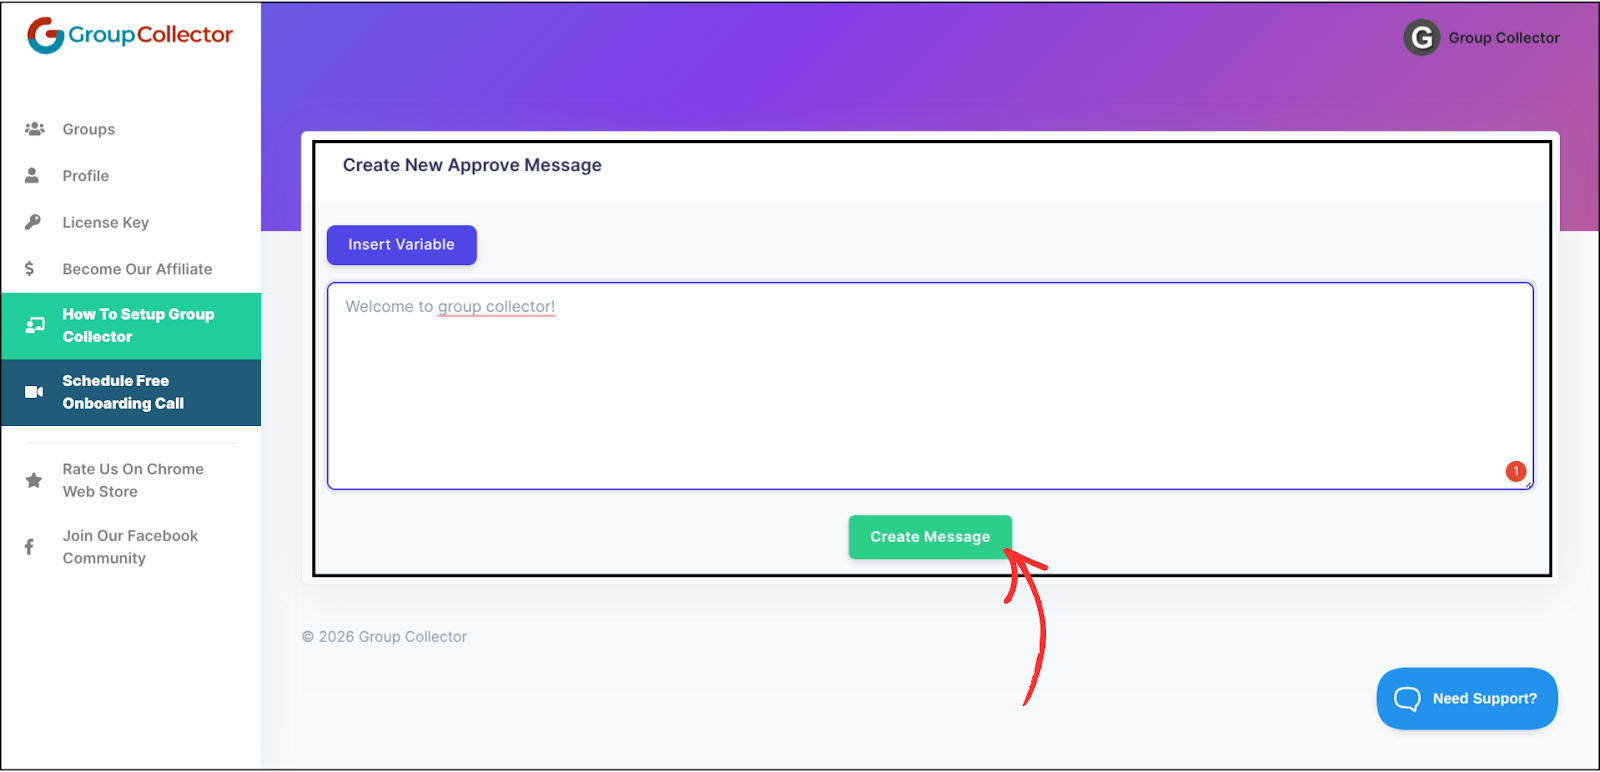
Type the approve message you want and click Create Message button.
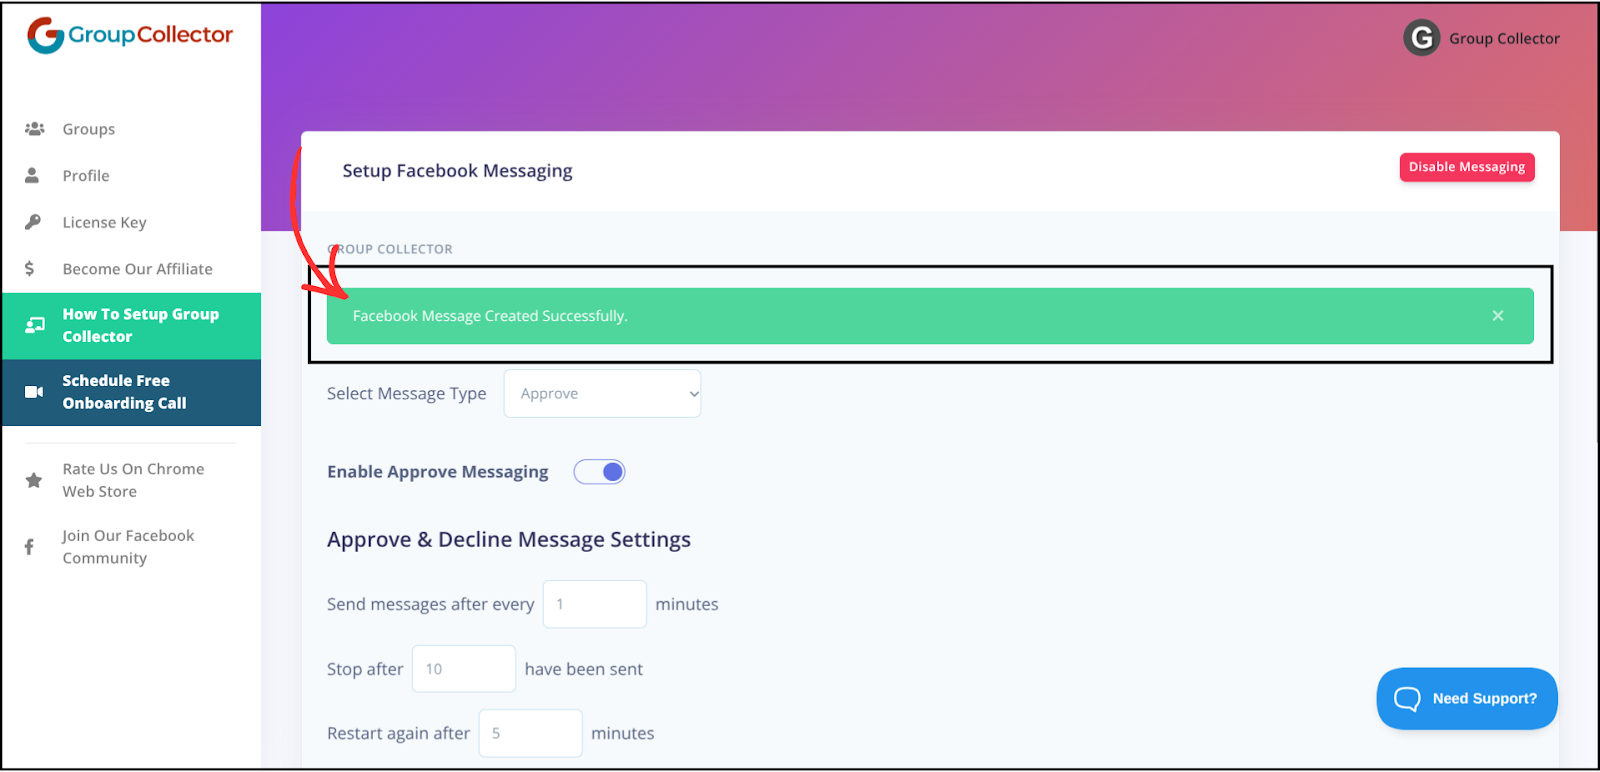
The approval message will be created successfully.
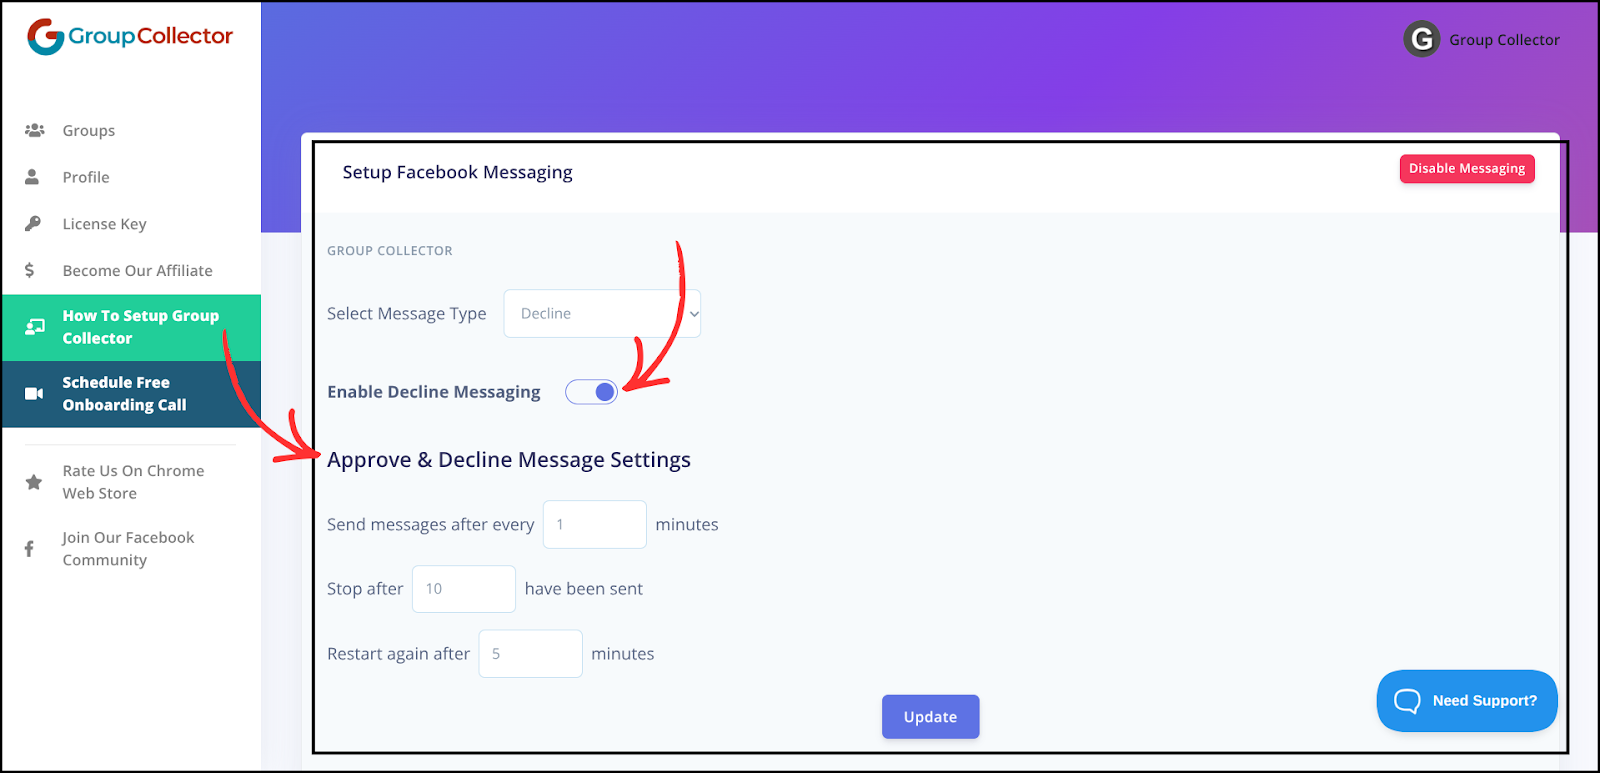
2. Decline Message
This message is sent when you normally decline a member.
Make sure to enable Decline Messaging.
Adjust message only timing, sending limits, and restart intervals based on your preference. Settings are the same for both the approve and decline messages.
If you want to update settings, after adjusting, click Update.
It sends when you:
- Click Decline
- Click Decline All
- Click Decline Selected
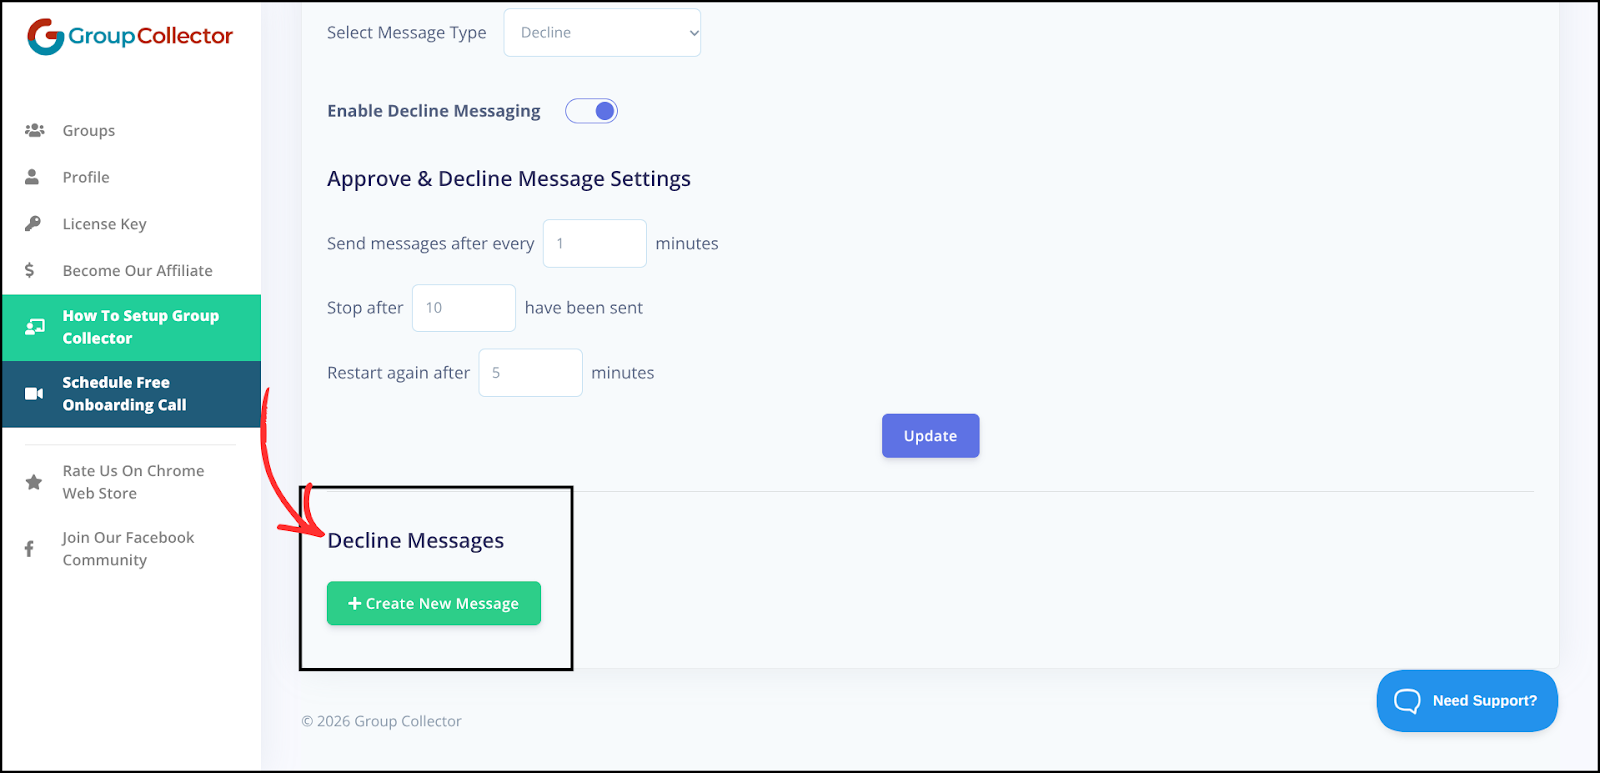
To create a new Decline Message, click Create New Message.
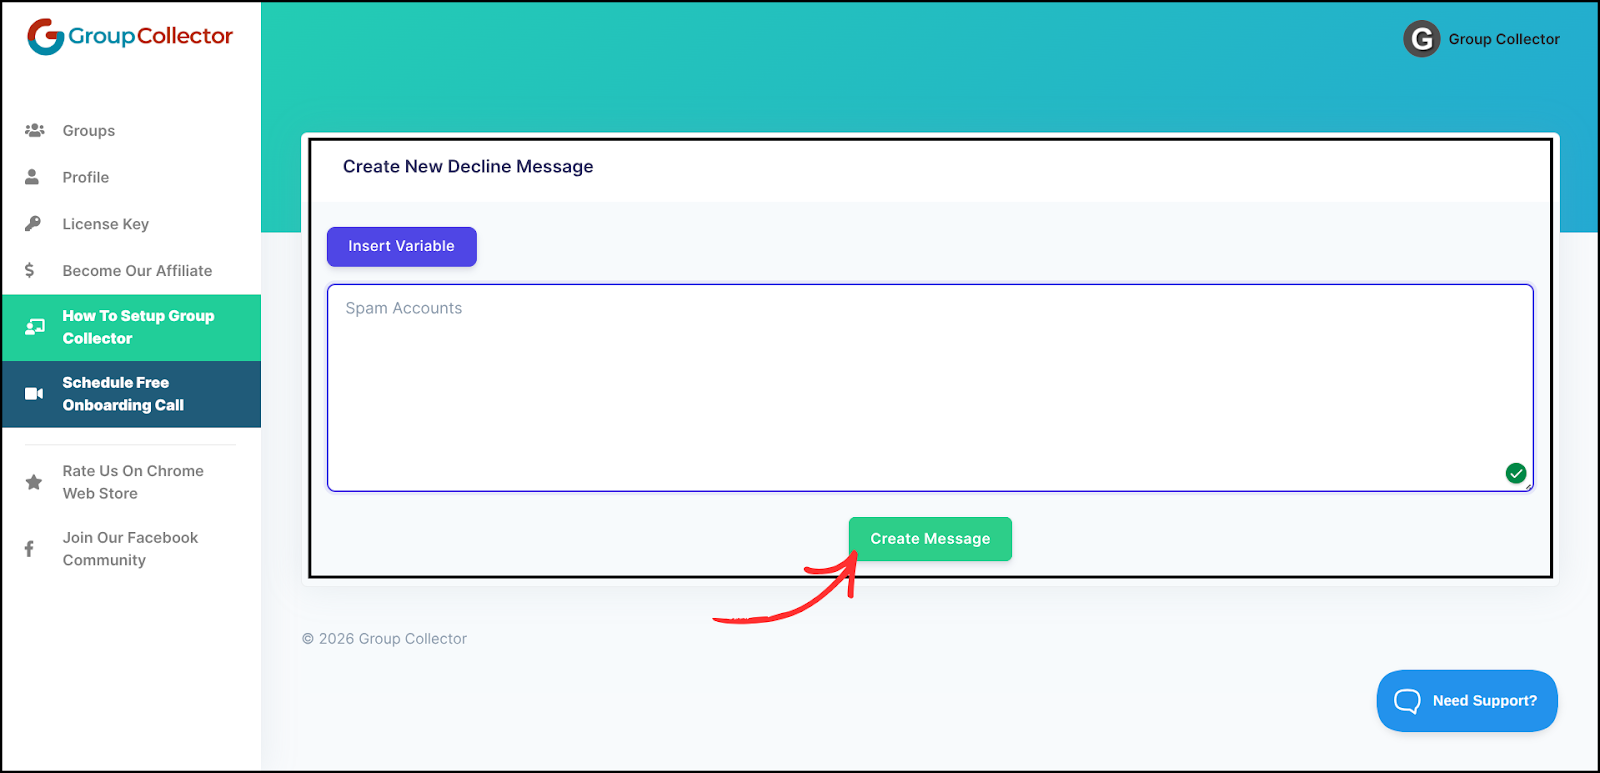
Type the message you want to send and click Create Message.
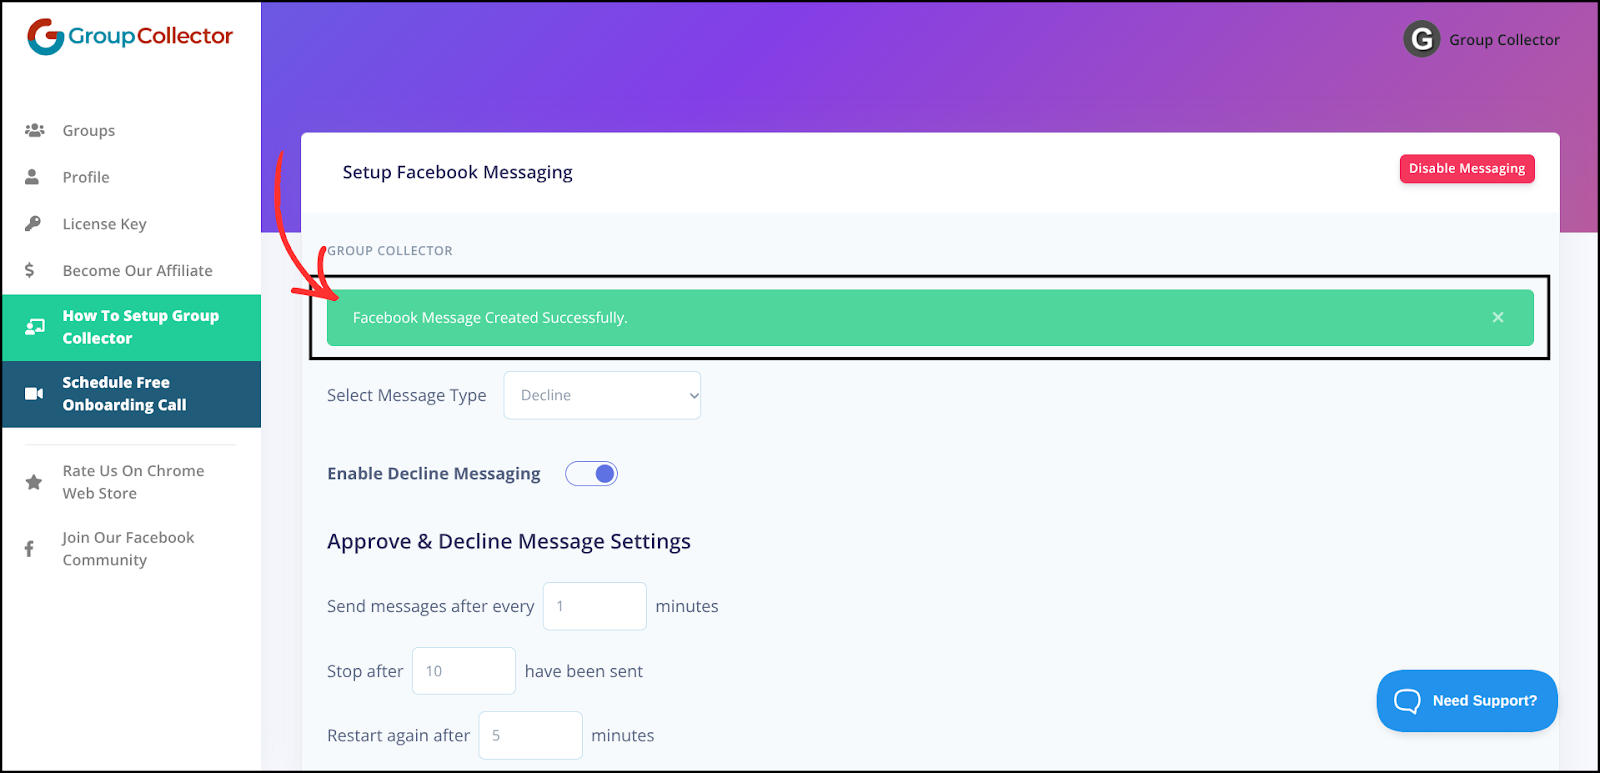
Decline Messages will be created successfully.
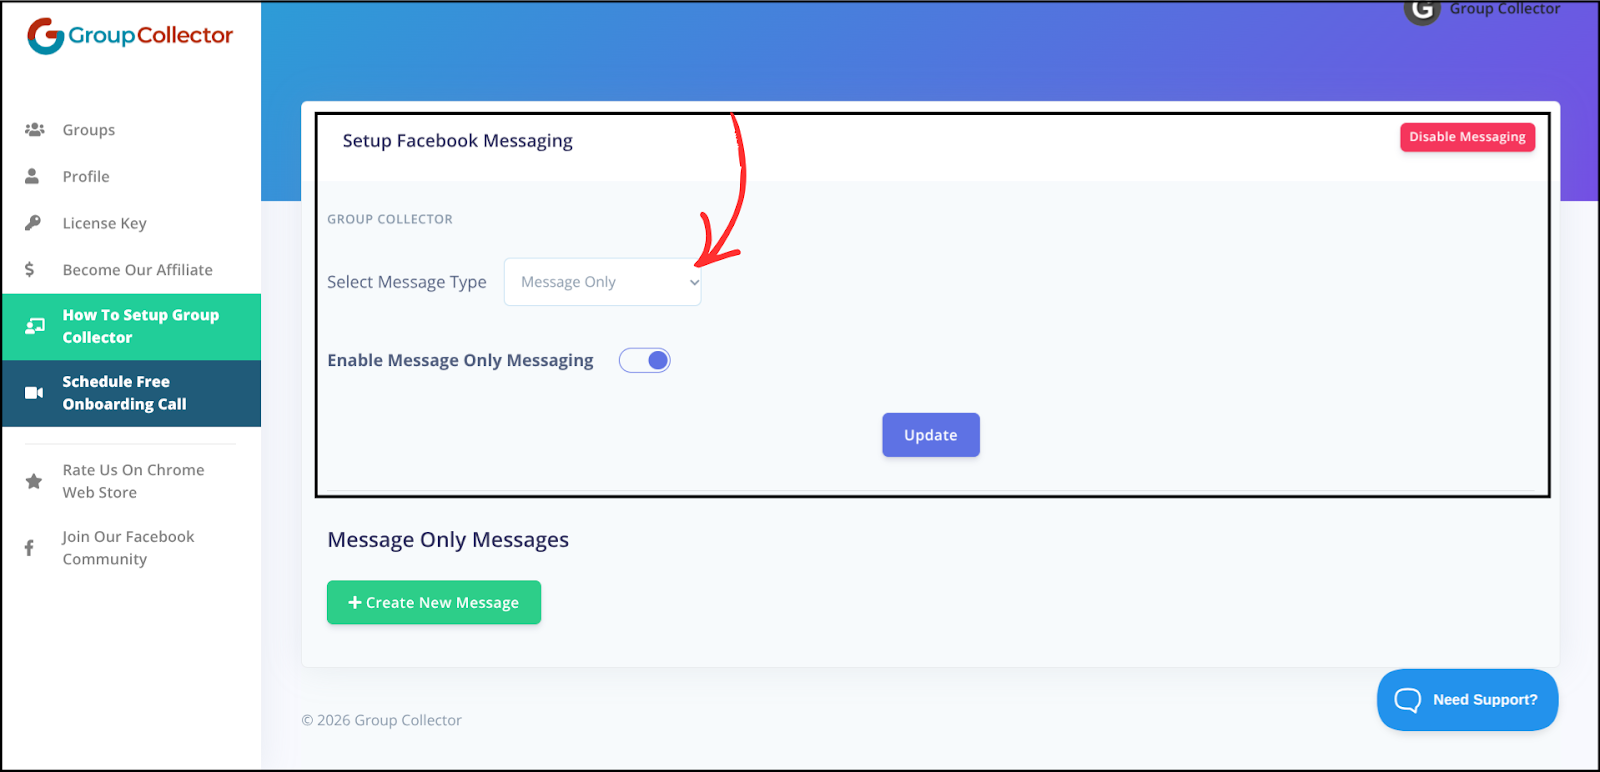
3. Message Only
This sends a message without approving or declining the member.
Make sure to enable Message Only Messaging.
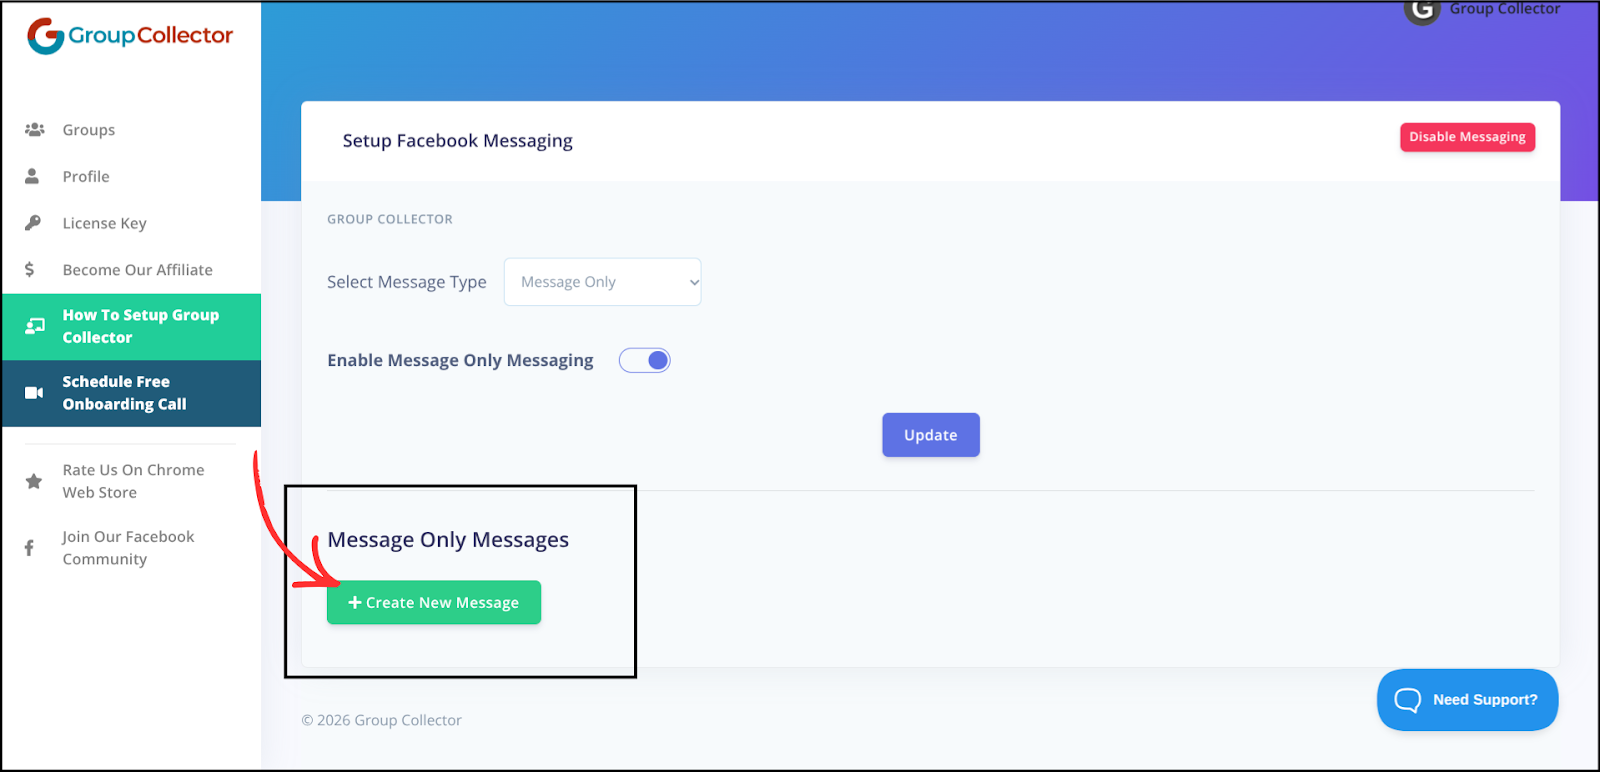
To create a new message-only message, click Create New Message.
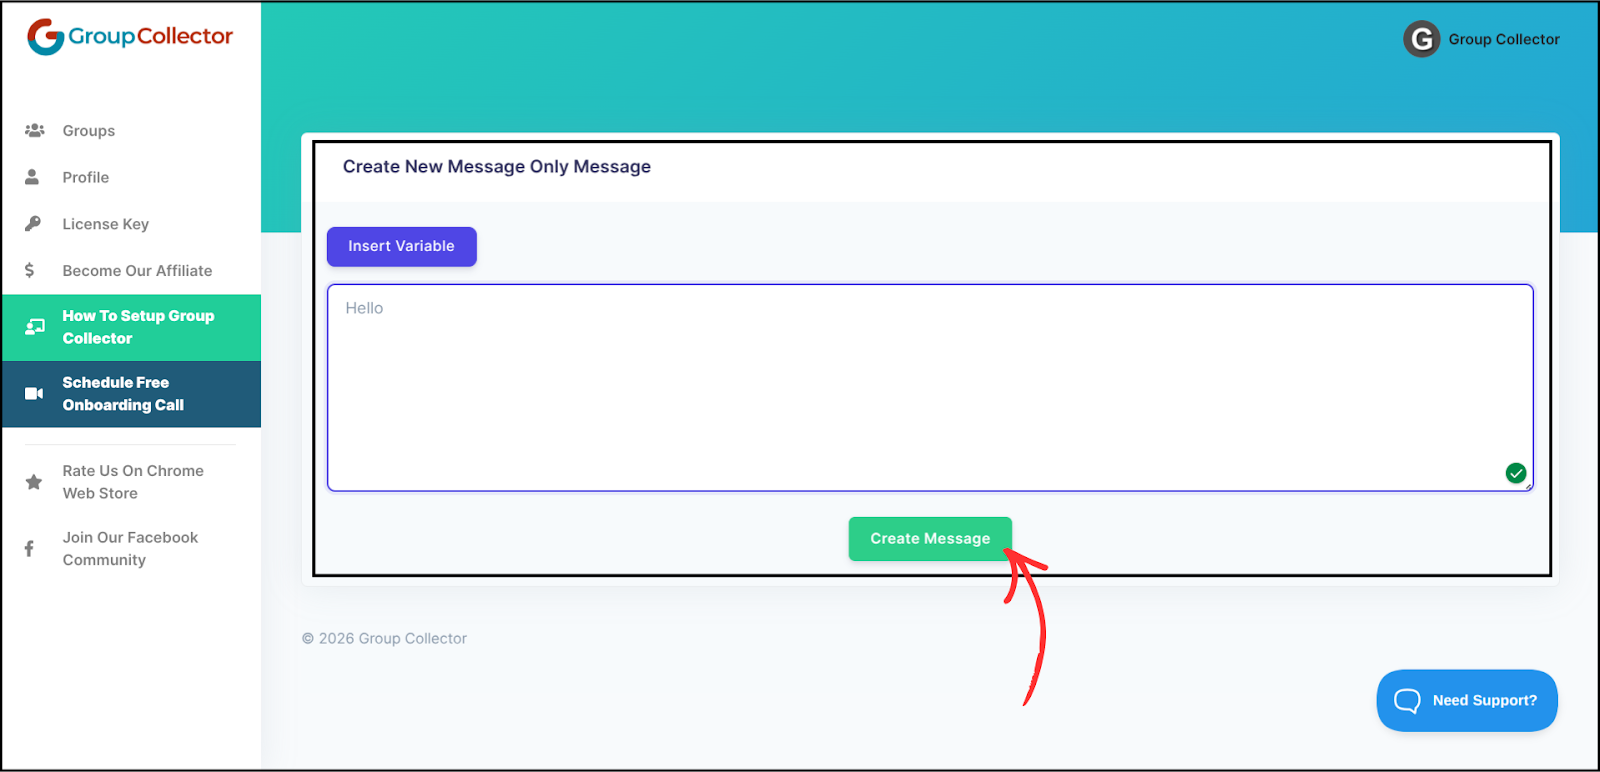
Type the message you want to send and click Create Message.
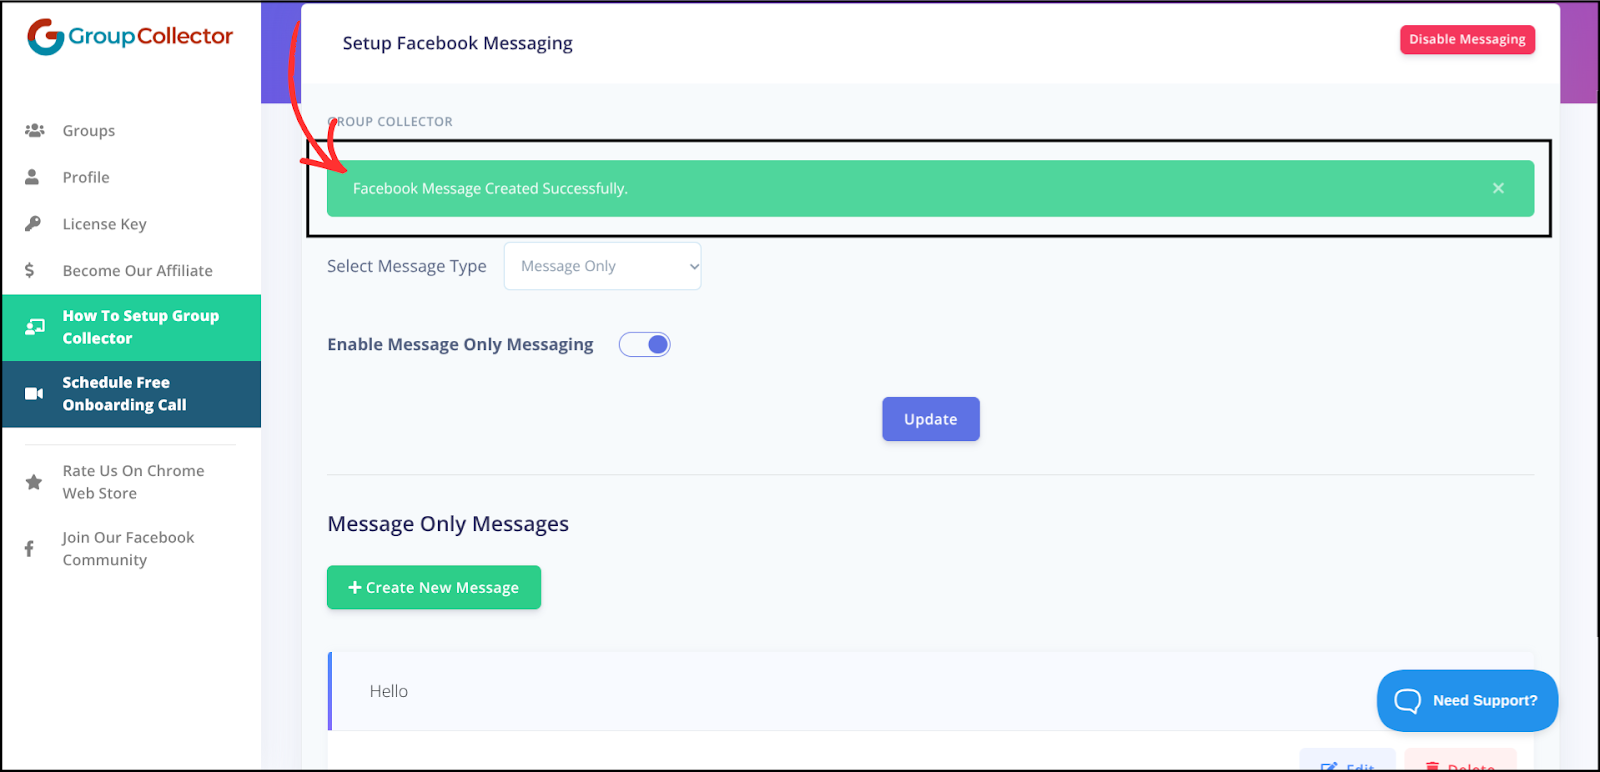
Message will be created successfully
4. Decline with Feedback
Make sure to enable Decline With Feedback Messaging.
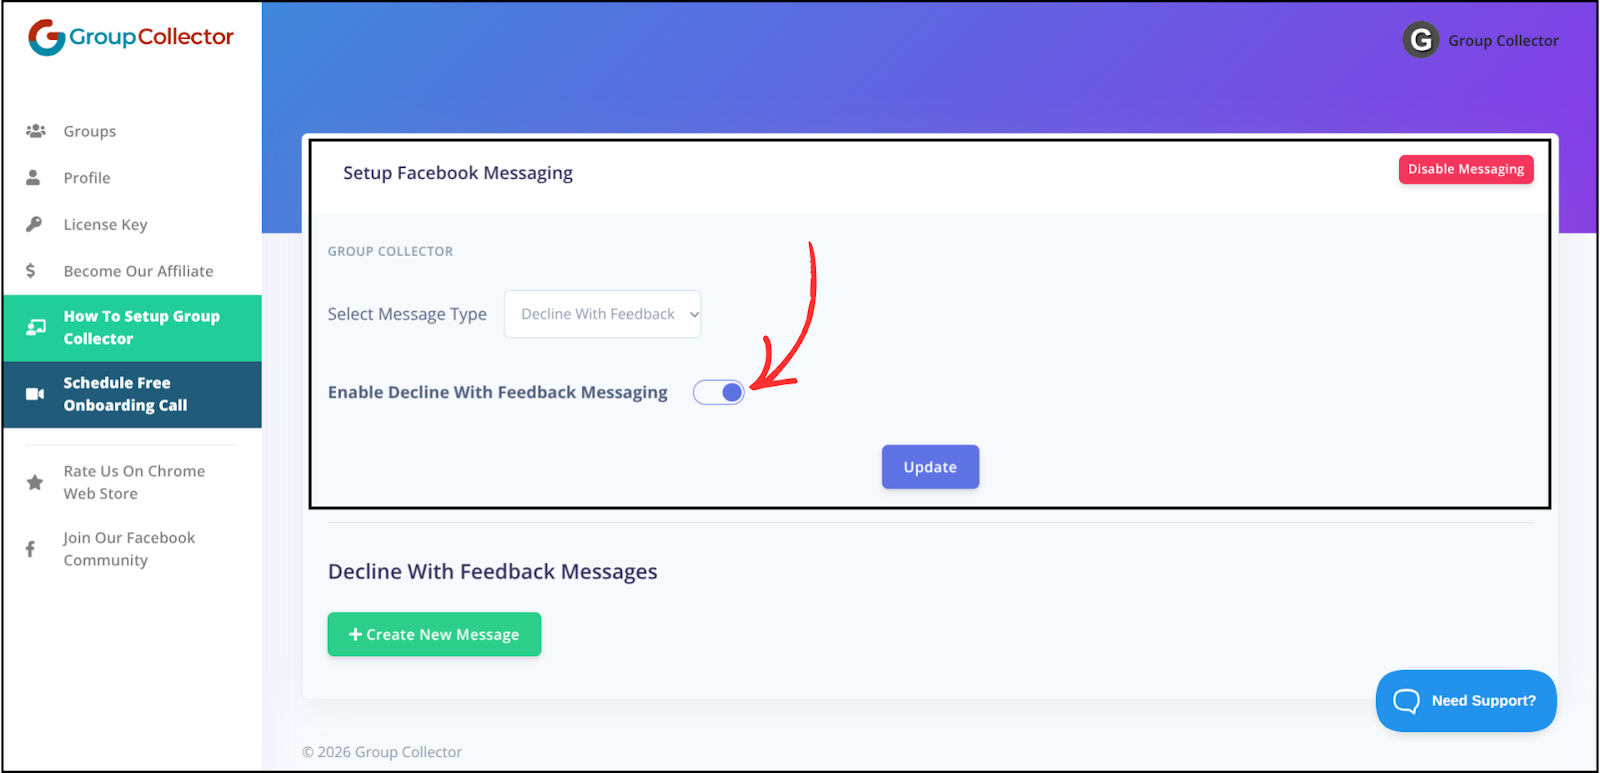
It sends when you:
- select members and Click on the Decline with Feedback button (next to GC Decline All)
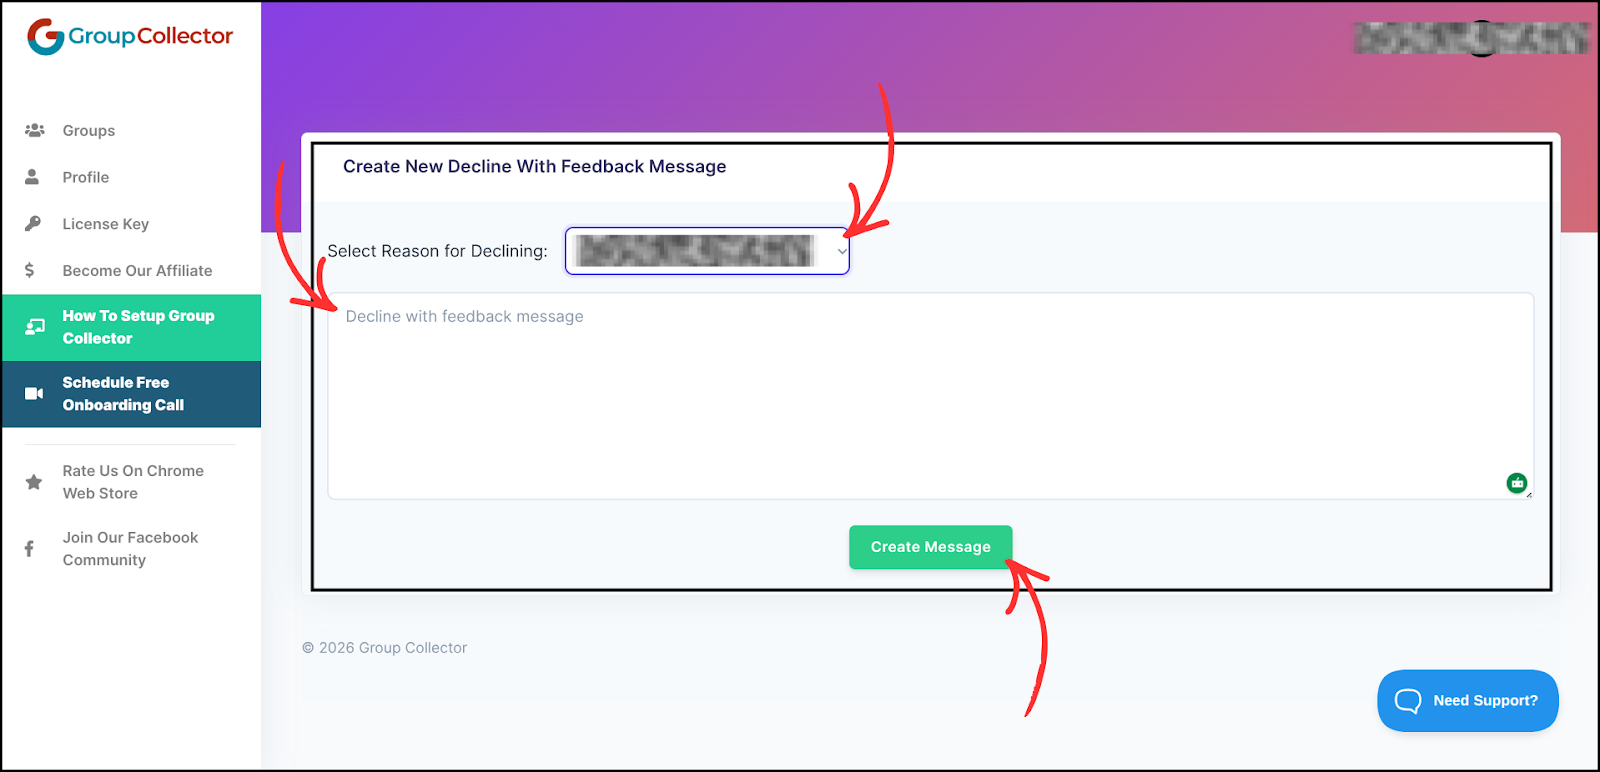
To Create a New Decline with Feedback Message:
-
Choose a reason:
Issue with answer to questions
Didn’t agree to group rules
Other
- Add a custom message. And Click on Create Message.
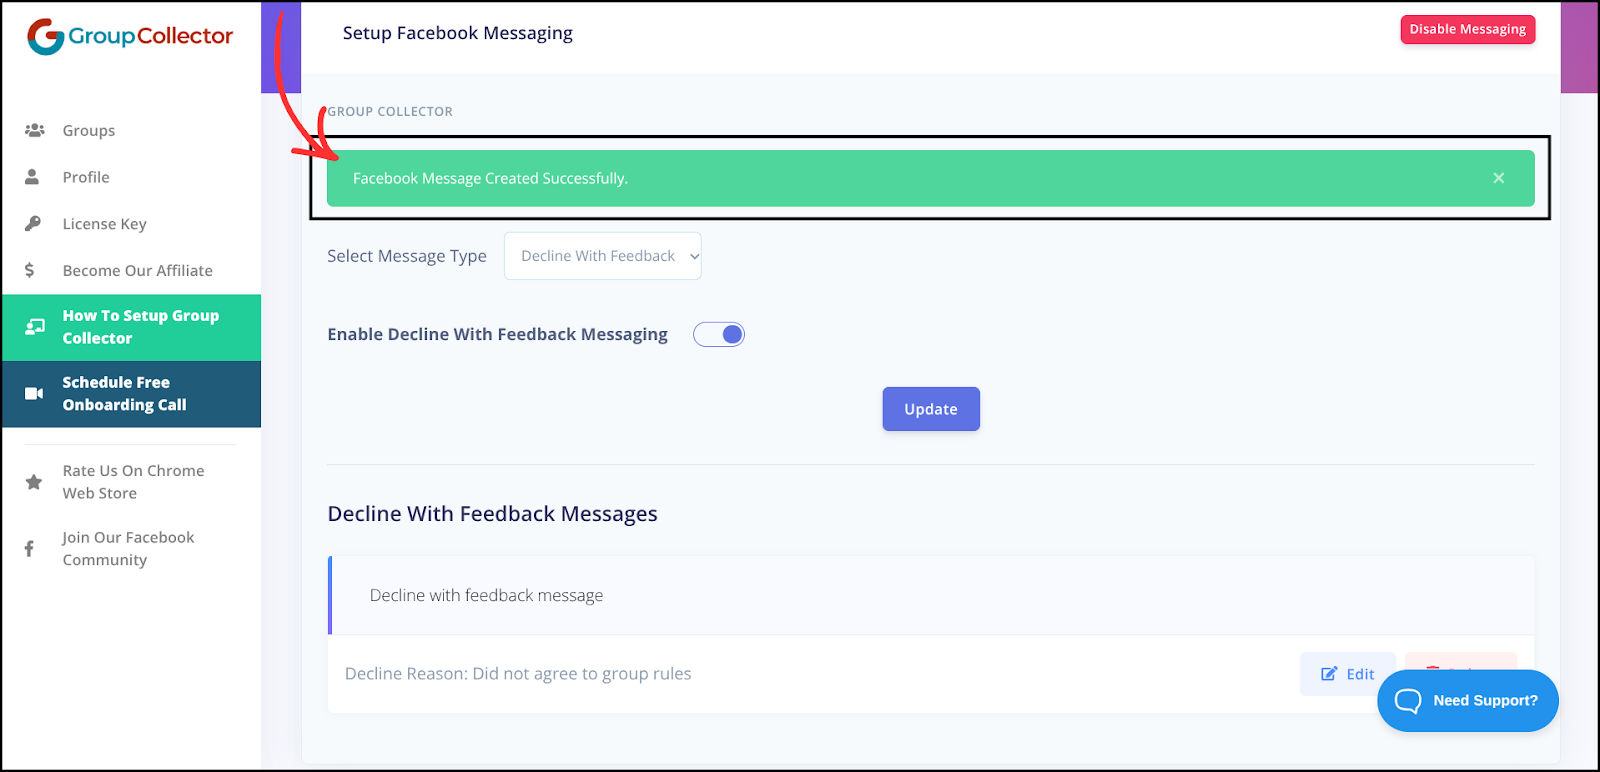
Decline with feedback message will be created successfully.
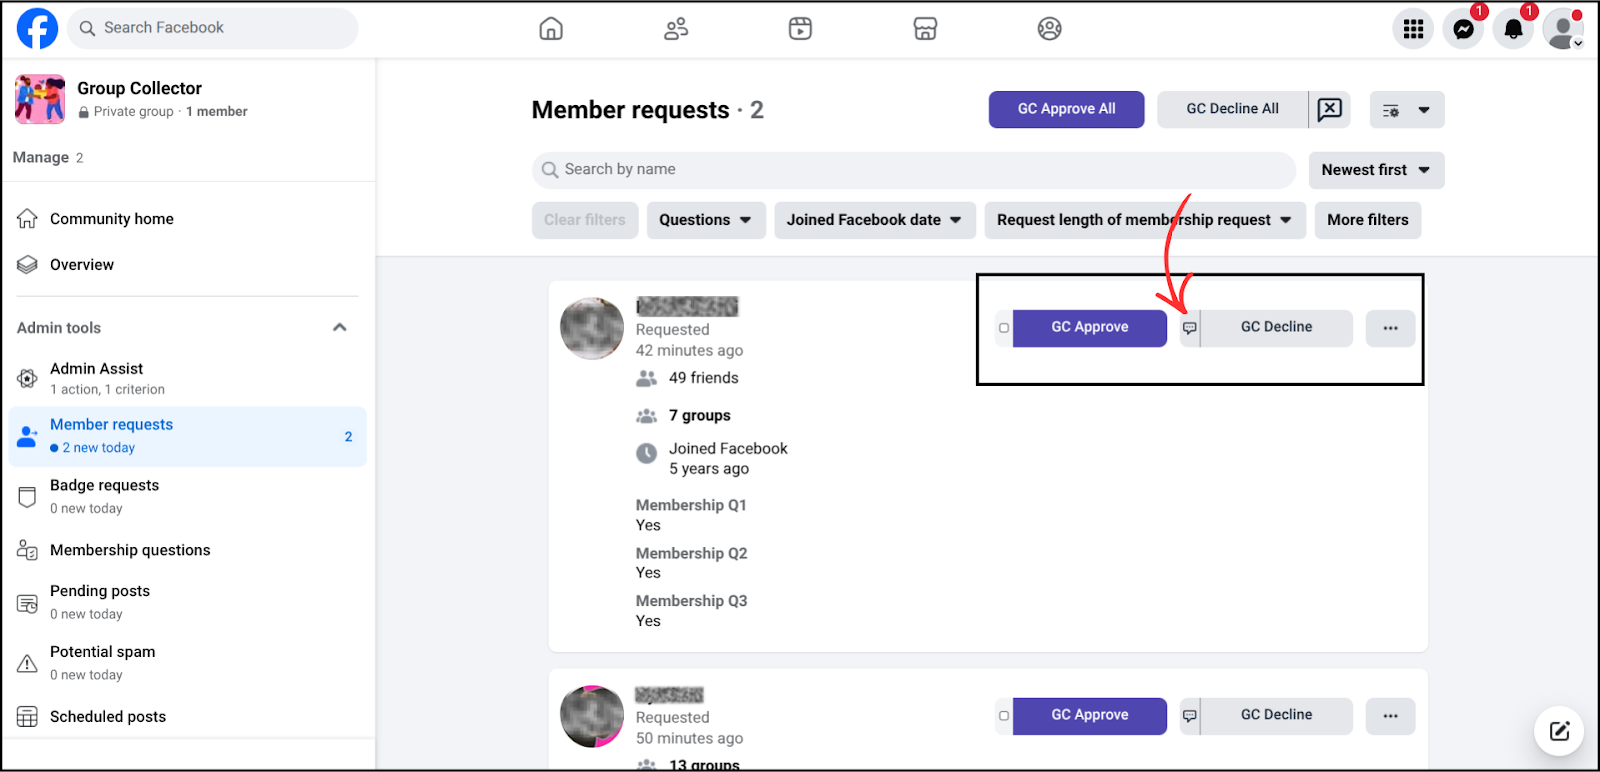
Facebook Group Member Request
When there are multiple member requests, you can use GC Approve All to approve everyone at once or GC Decline All to decline all requests.
To Decline with Feedback, click the cross (✕) icon next to GC Decline All.
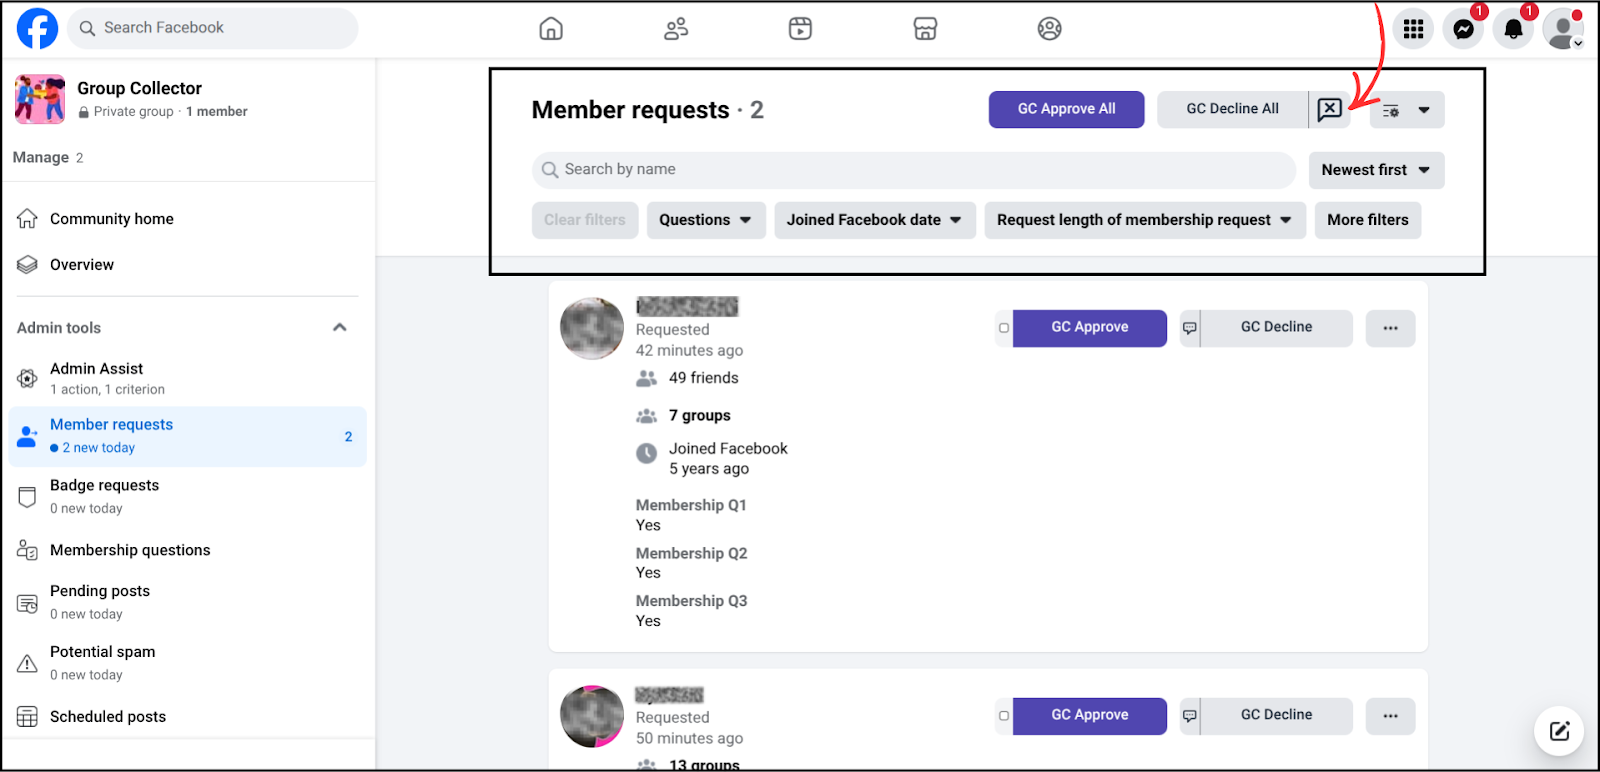
After clicking GC Approve All, GC Decline All, or Decline with Feedback, a pop-up window opens, and the message is automatically typed and sent to the member(s).
In front of each member request, before the GC Decline button, there is a message icon. Clicking this icon allows you to send a Message Only (Pre-Approval Message) without approving or declining the member.
Personalization
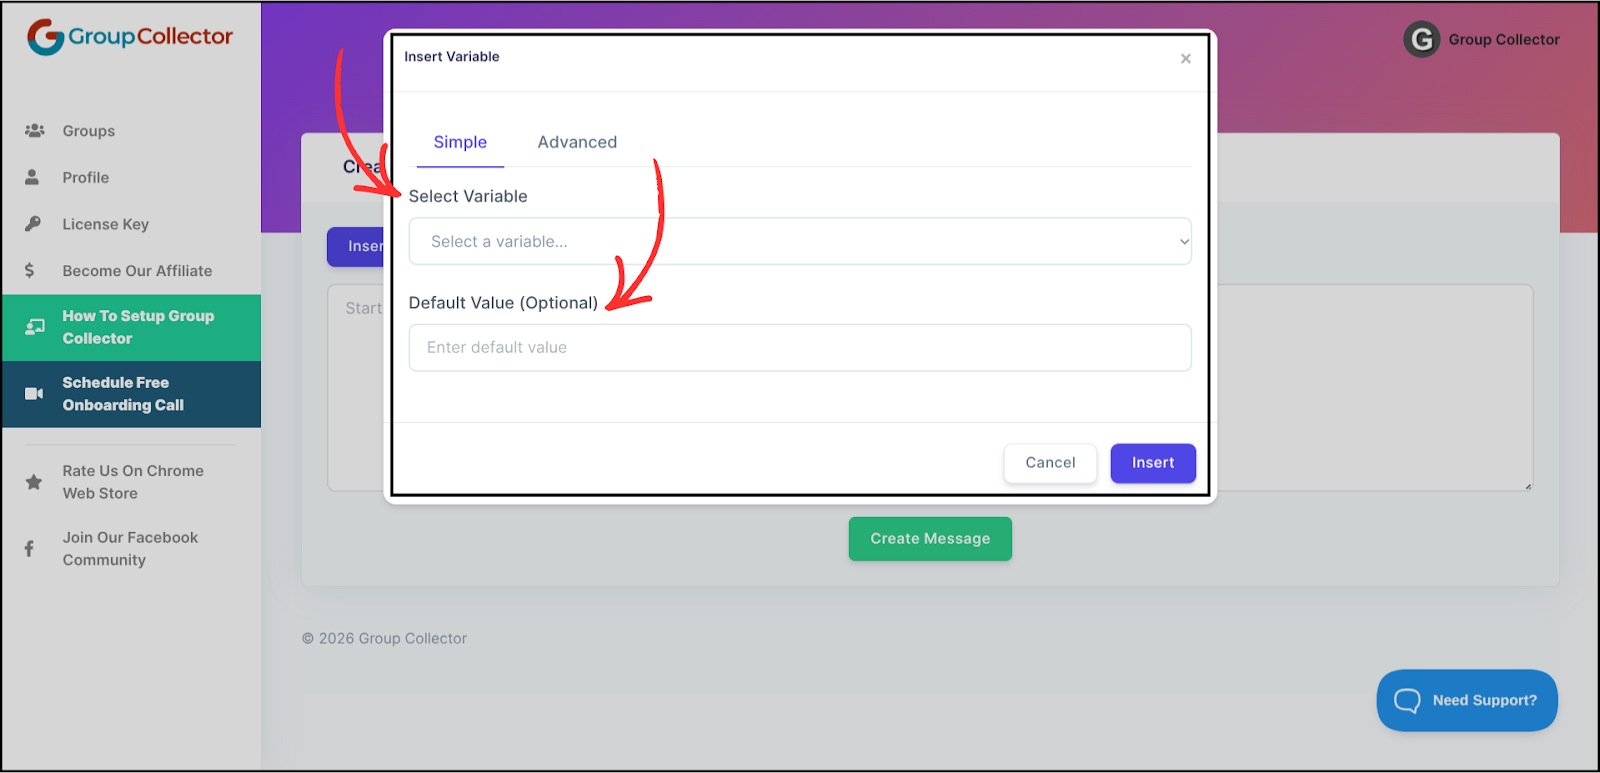
Personalization lets you automatically insert member details into your message.
Simple Variables (Basic Personalization)
When you click Insert Variable → Simple, you can choose from options like:
- First Name
- Last Name
- Group Name
- Group URL
- Question 1, 2, 3
- Answer 1, 2, 3
- Facebook User URL
- Lives in (City, Country)
- Group Rules (true or false)
If the name exists, it will show.
If not, you can add a default value.
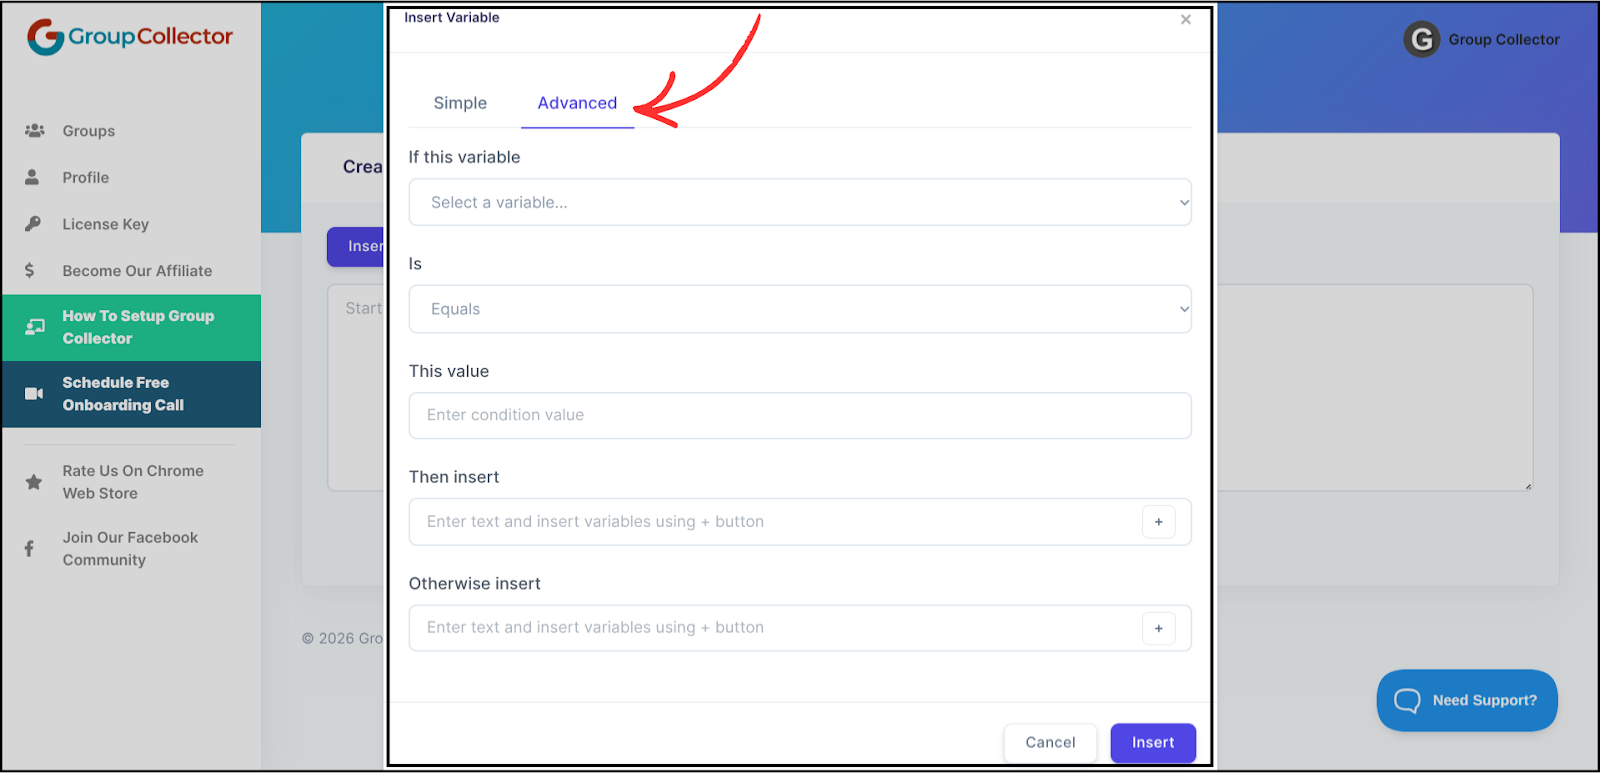
Advanced Personalization (Conditions)
Advanced personalization lets you show different text based on conditions.
You’ll see this under Insert Variable → Advanced.
You will see these fields:
- If this variable
- Is
- This value
- Then insert
- Otherwise insert
How Messages Are Sent
- You click Approve / Decline / Message
- Group Collector prepares the message
- A message template is selected
- Facebook Messenger opens
- The message is sent automatically
- Then it moves to the next member
When Approving or Declining Many Members
- Members are processed one by one
- A short delay is added between messages
- After a set number, it pauses
- Then continues again
This keeps your account safe from Facebook limits.
Multiple Messages
- You can create more than one message for the same type.
- When that action happens, Group Collector will randomly pick one message.
- This helps your messages feel more natural and less robotic.
Common Problems & Fixes
Message not sending?
- Make sure the message type is enabled
- Check that a message is created
- Ensure the extension is logged in
Variables not showing correctly?
- Check spelling
- Use default values
- Member data may be missing
Messenger not opening?
- Allow pop-ups
- Refresh Facebook
Final Summary
The Facebook Messages feature helps you:
- Save time
- Talk to every member properly
- Welcome approved users
- Clearly explain declines
- Personalize messages automatically
It turns your Facebook group into a smart, organized, and professional community.