How to Connect Group Collector with Kajabi
If you want your Facebook group members to be automatically added to Kajabi, you can connect Kajabi as an autoresponder inside Group Collector.
This integration lets you sync approved group members directly into Kajabi, apply tags, and trigger automations without manual effort.
What You Need Before Starting
To complete this integration, you'll need:
Required:
- Kajabi Client ID
- Kajabi Client Secret
This guide will show you how to get both.
Optional:
- Site ID
- Tags
Also, make sure:
- You have an active Kajabi account with the Pro plan
- Your Facebook group is connected to Group Collector
- Membership questions are already set
Step 1: Get Kajabi Client ID & Client Secret
Group Collector uses Kajabi's Public API to securely send leads.
Follow these steps:
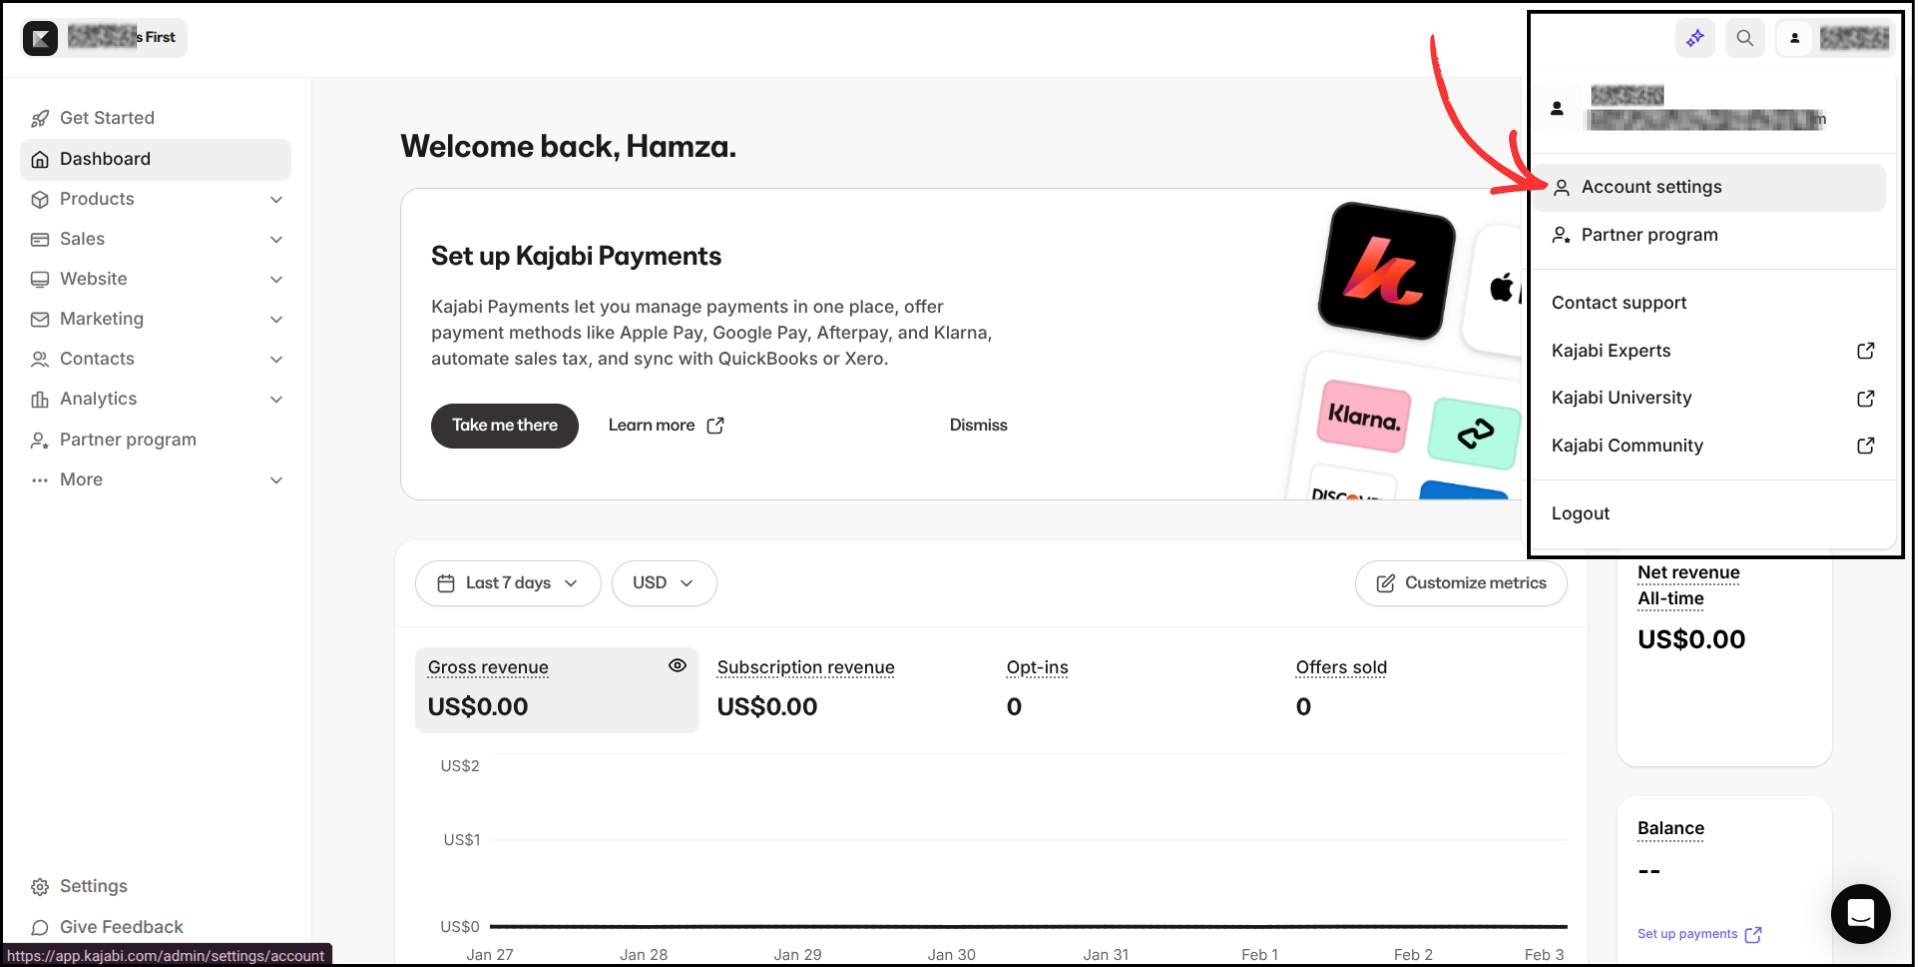
- Log in to your Kajabi dashboard
- Click the profile icon in the top-right corner
-
From the dropdown menu, click Account Settings
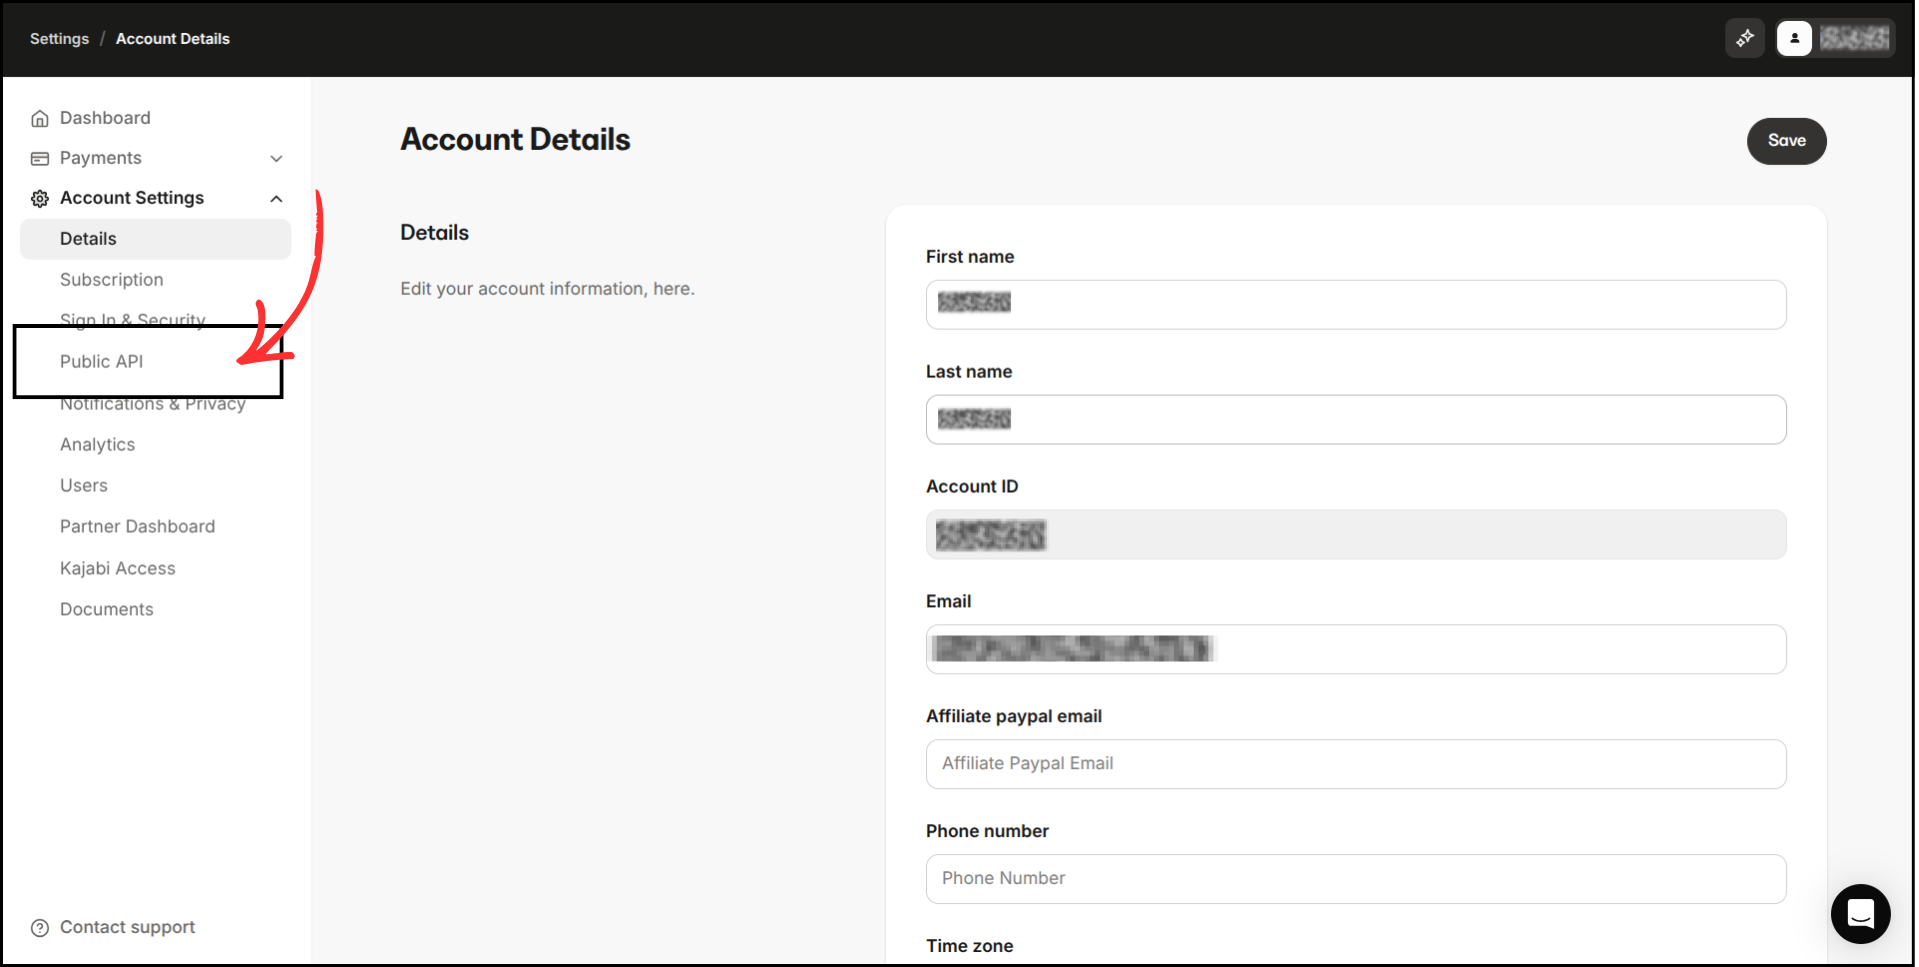
- A new page will open
-
From the left panel menu, click Public API


You will see:
- Client ID
-
Client Secret
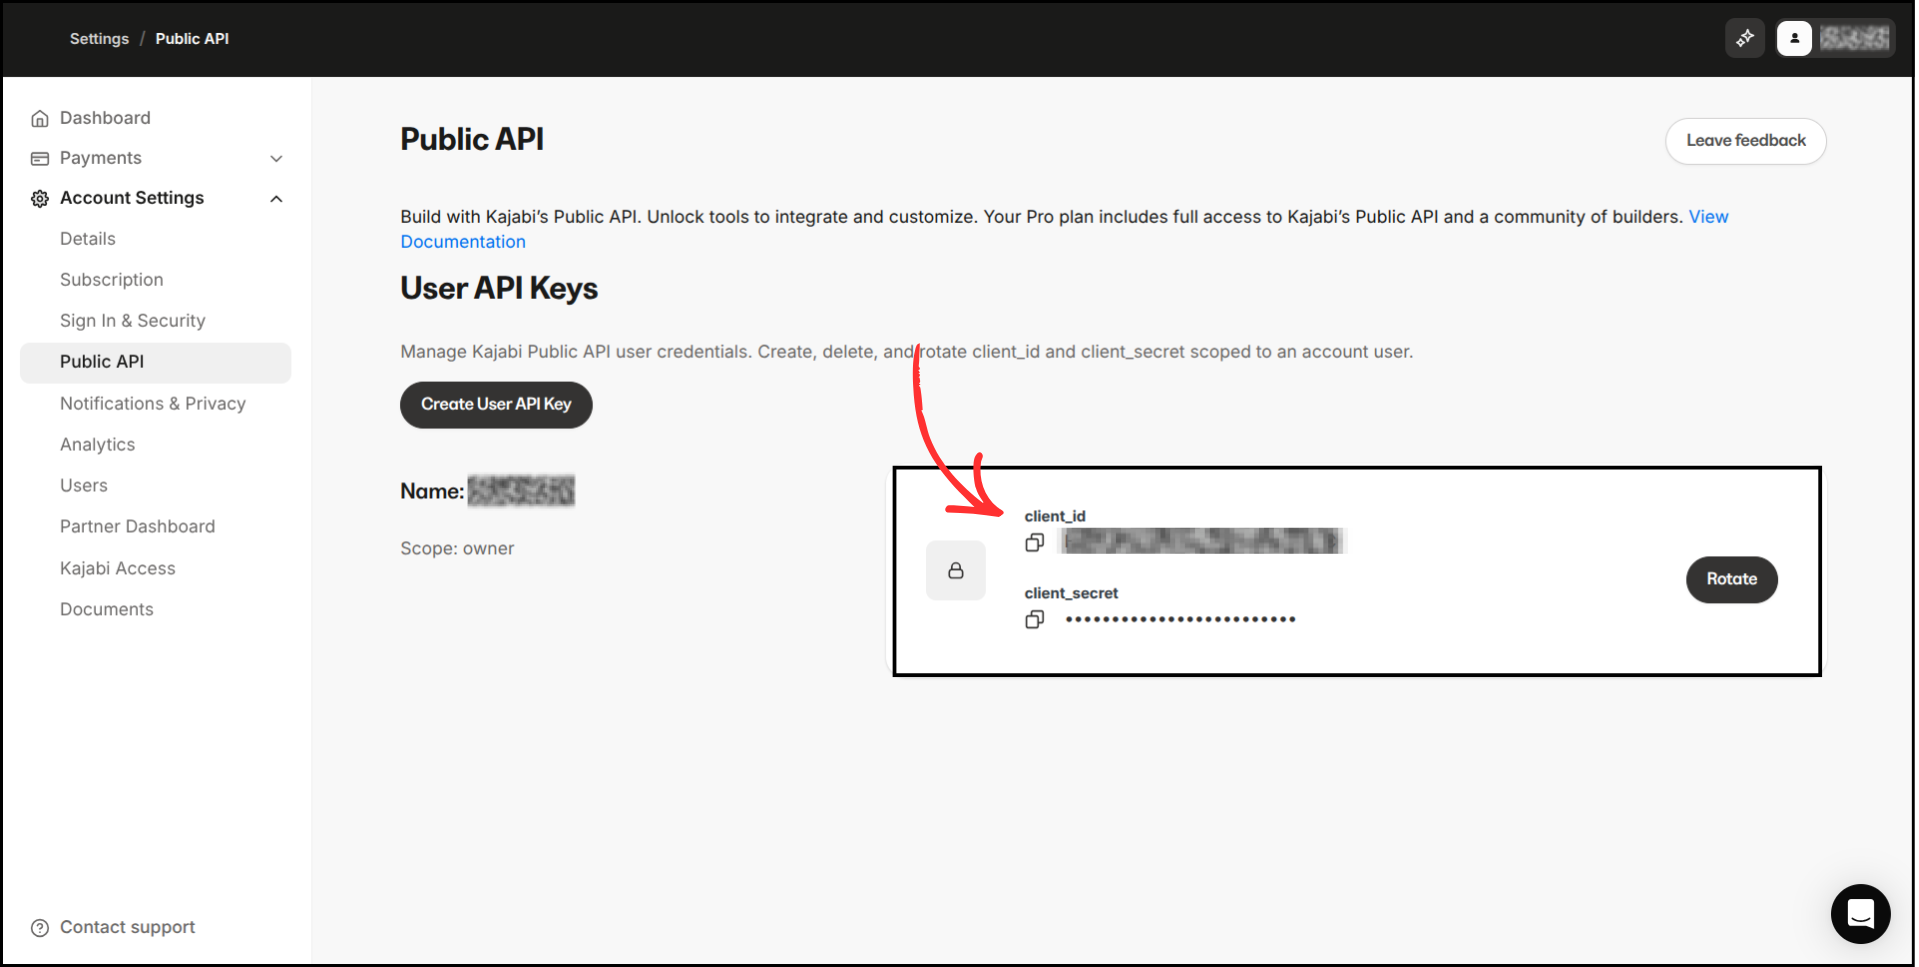

Copy both values and save them securely. Do not share these credentials publicly.
Step 2: Get Your Kajabi Site ID (Optional)
The Site ID helps Group Collector identify the correct Kajabi site (useful if you manage multiple sites). If you have only one site, leave it empty, and Group Collector will automatically find it.
How to find it:
Go to your Kajabi main dashboard and look at the browser URL. Your URL would look like this: https://app.kajabi.com/admin/sites/SITE_ID/dashboard.

Copy the Site ID (number) from the URL and save it.
Step 3: Create or Find Tags in Kajabi (Optional)
Tags help organize and segment your leads inside Kajabi.
Follow these steps:
-
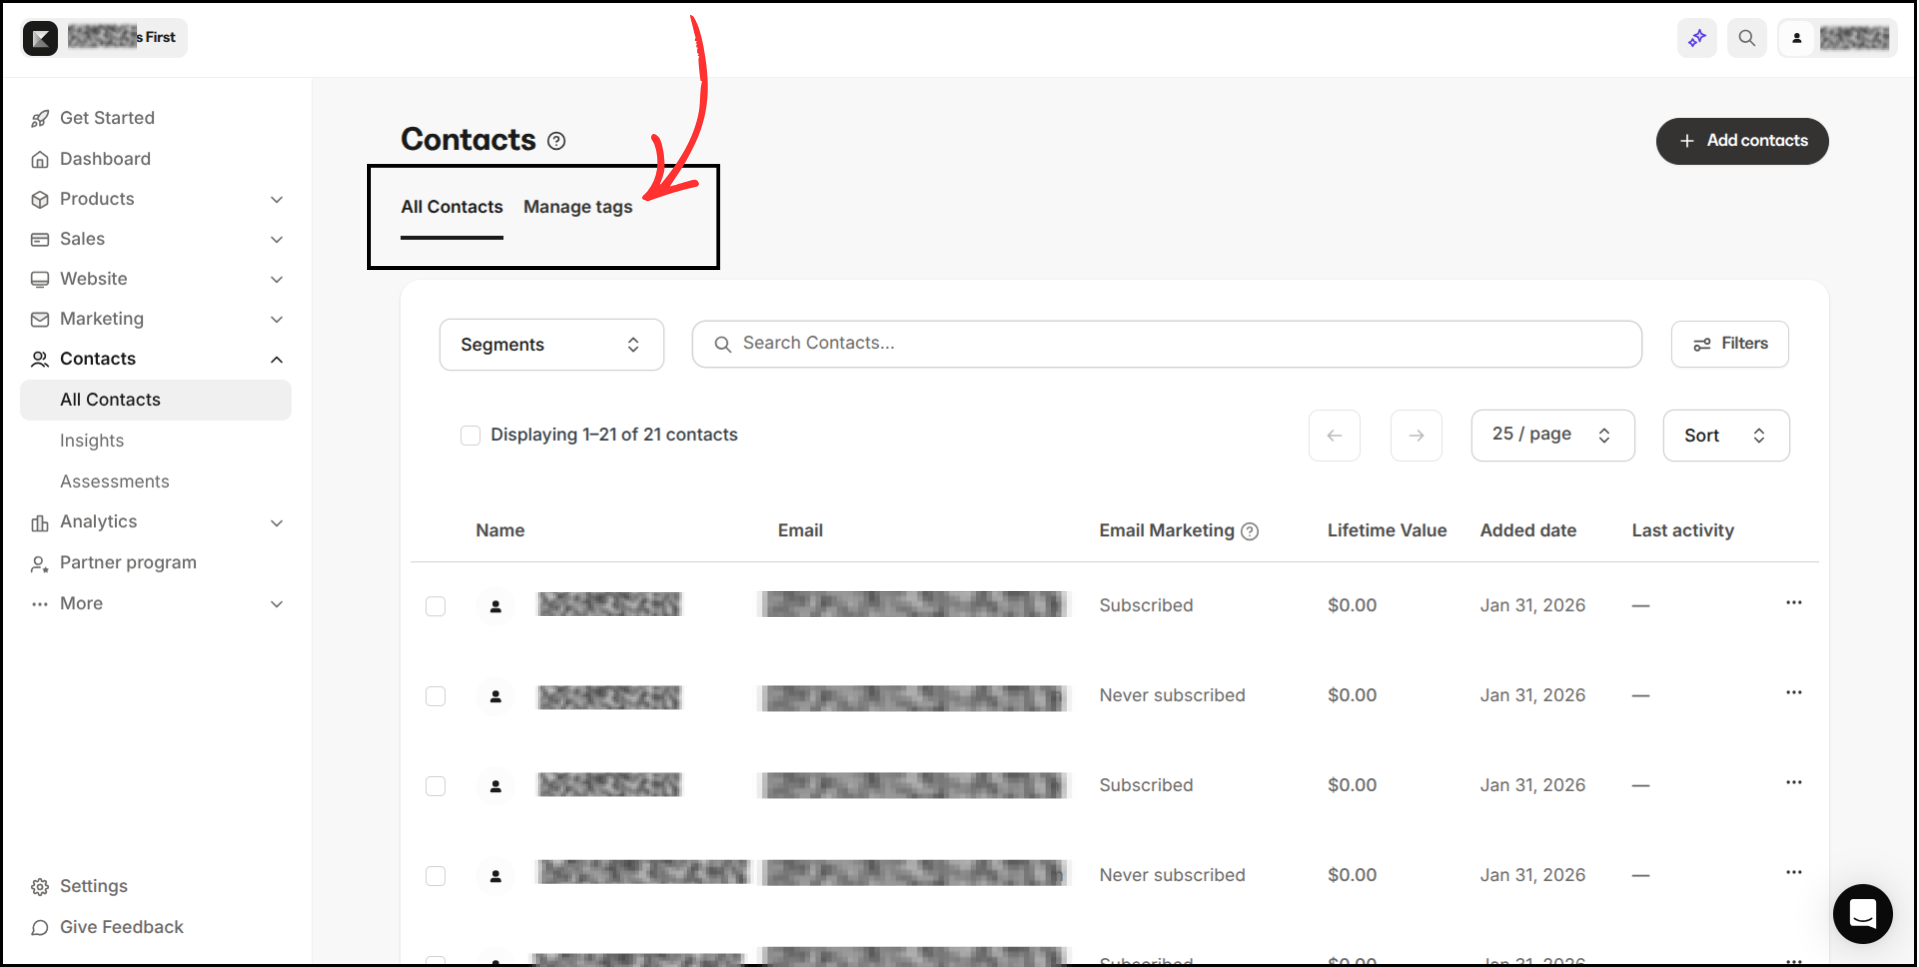
In the Kajabi dashboard, click Contacts in the left-hand menu
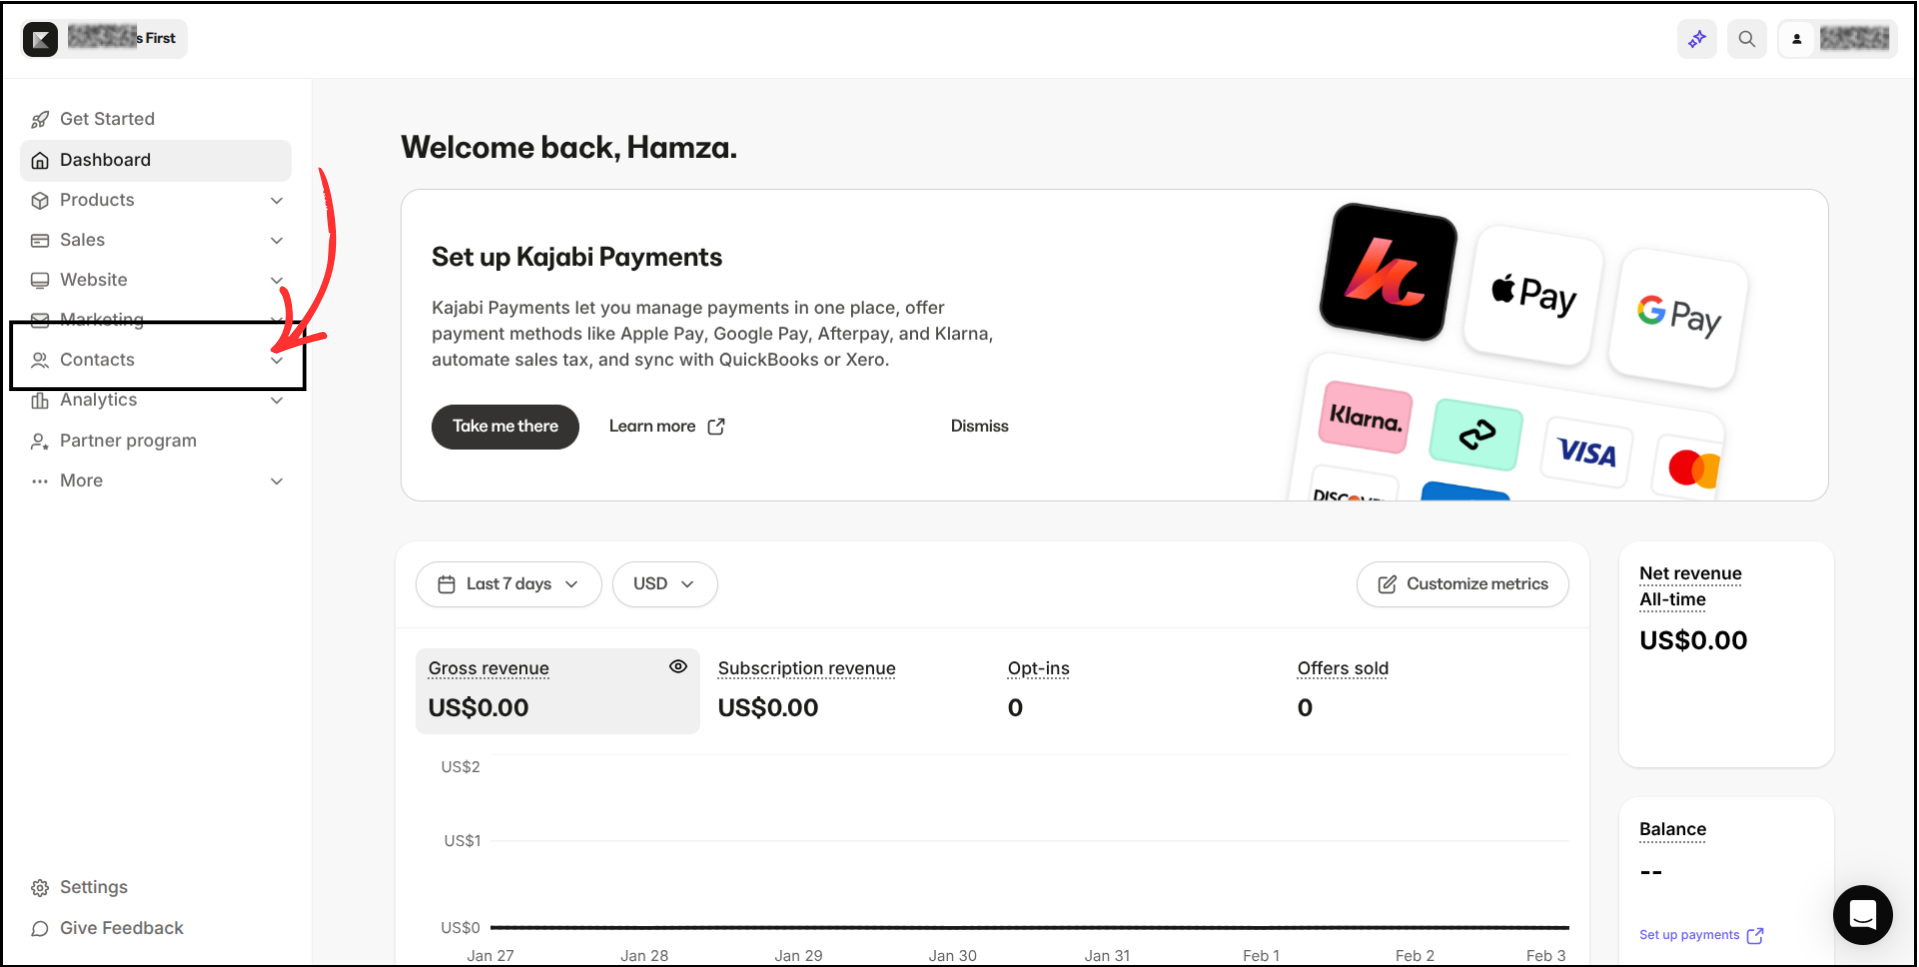
- Under Contacts, click All Contacts
-
Next to All Contacts, click Manage Tags


Here you can:
- View existing tags
-
Create a new tag by clicking Add Tag if needed
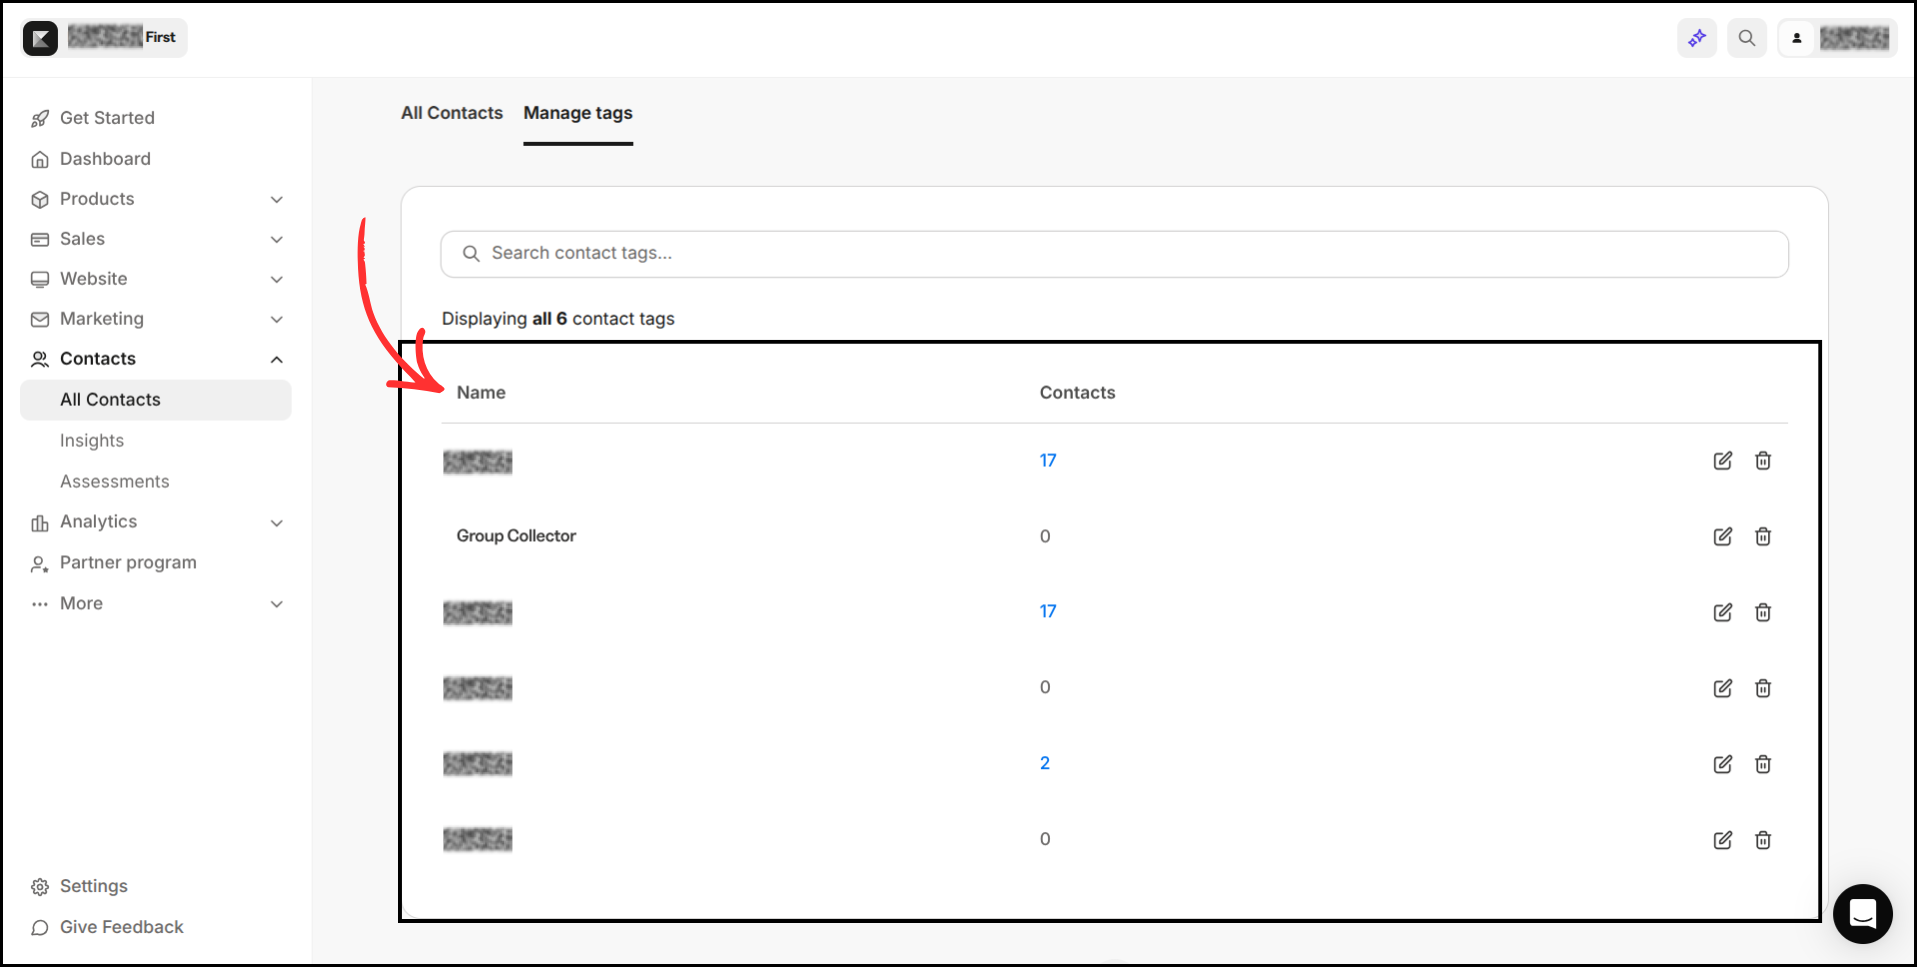

Copy the tag name. You can apply multiple tags if needed. Make sure that the tag is created in your Kajabi.
Step 4: Add Kajabi as an Autoresponder in Group Collector
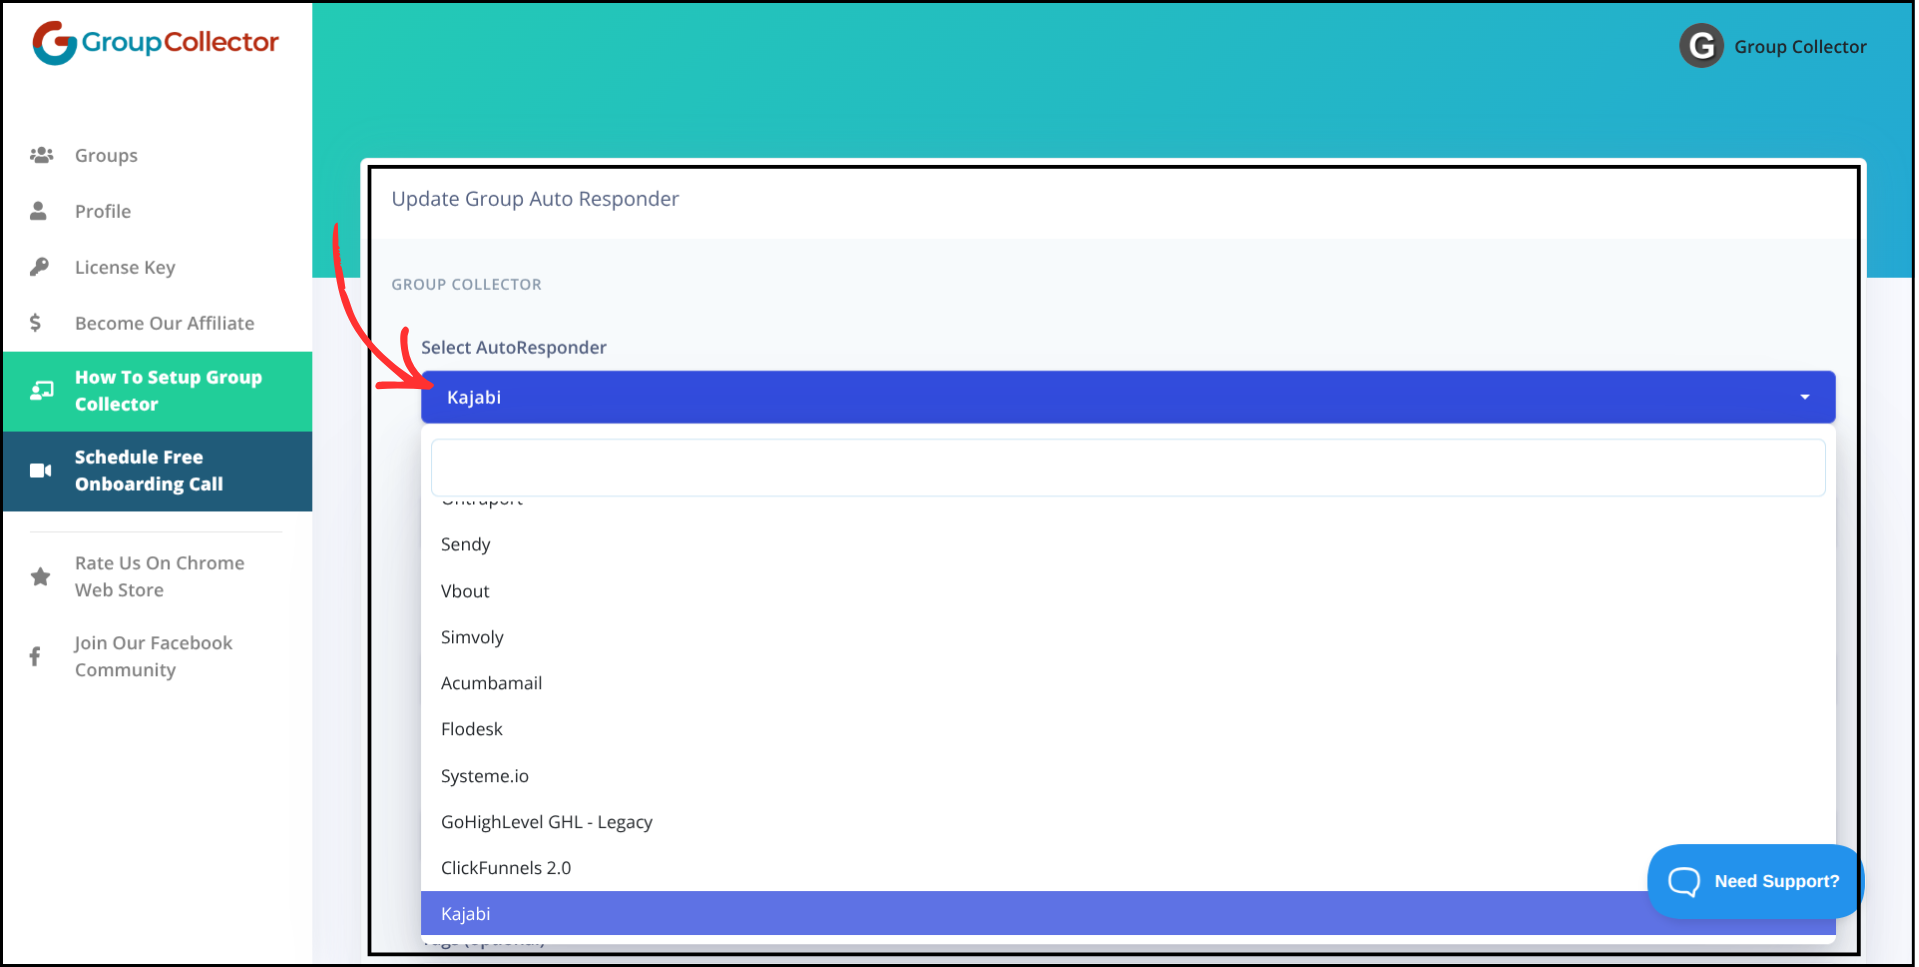
- Open the Group Collector dashboard
- Click Add button for the Autoresponder
-
From the list of autoresponders, select Kajabi

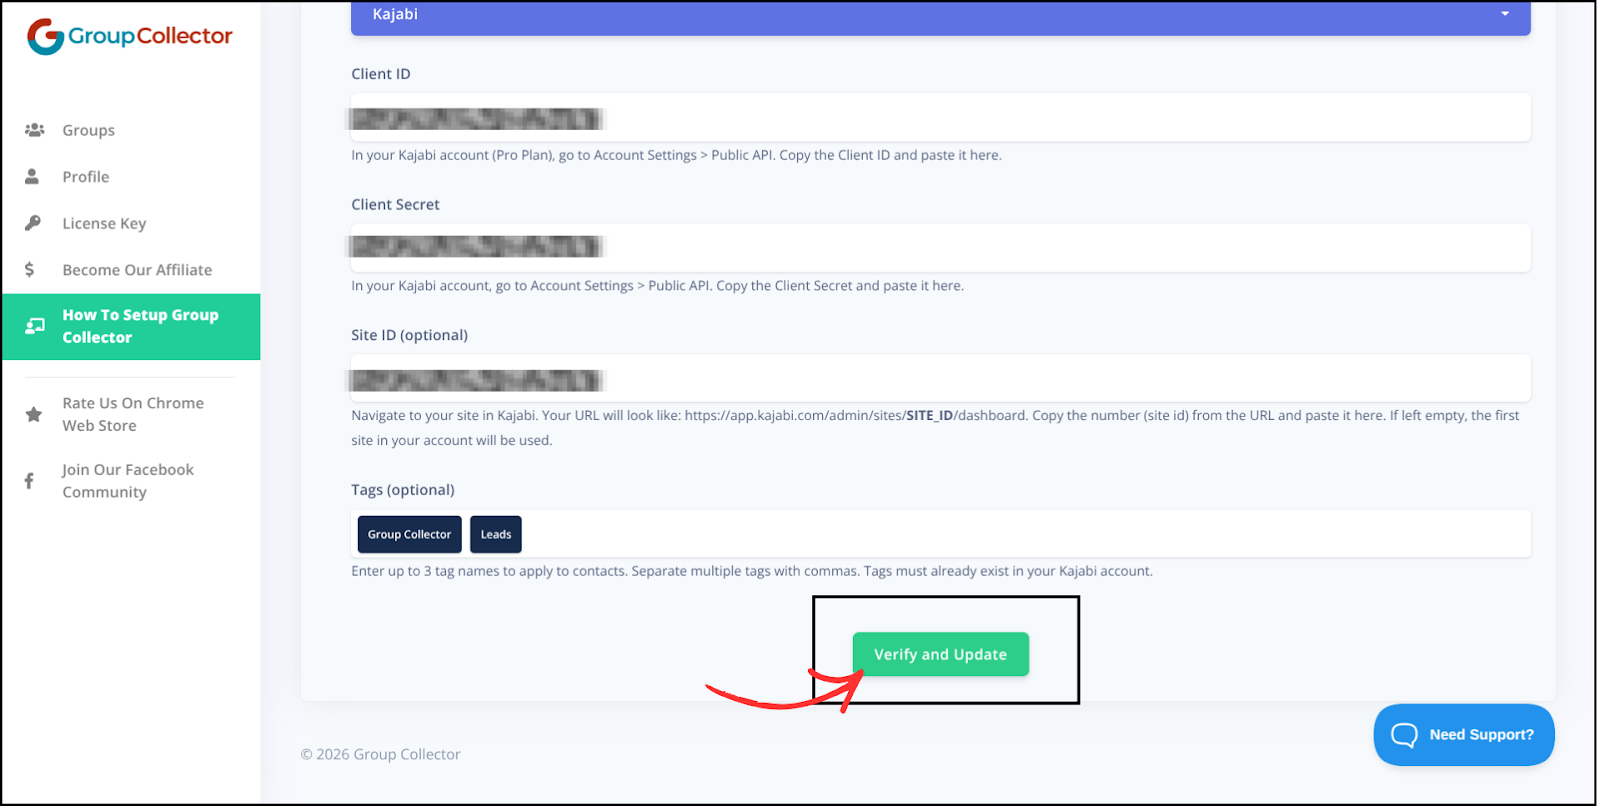
Step 5: Enter Kajabi Credentials in Group Collector
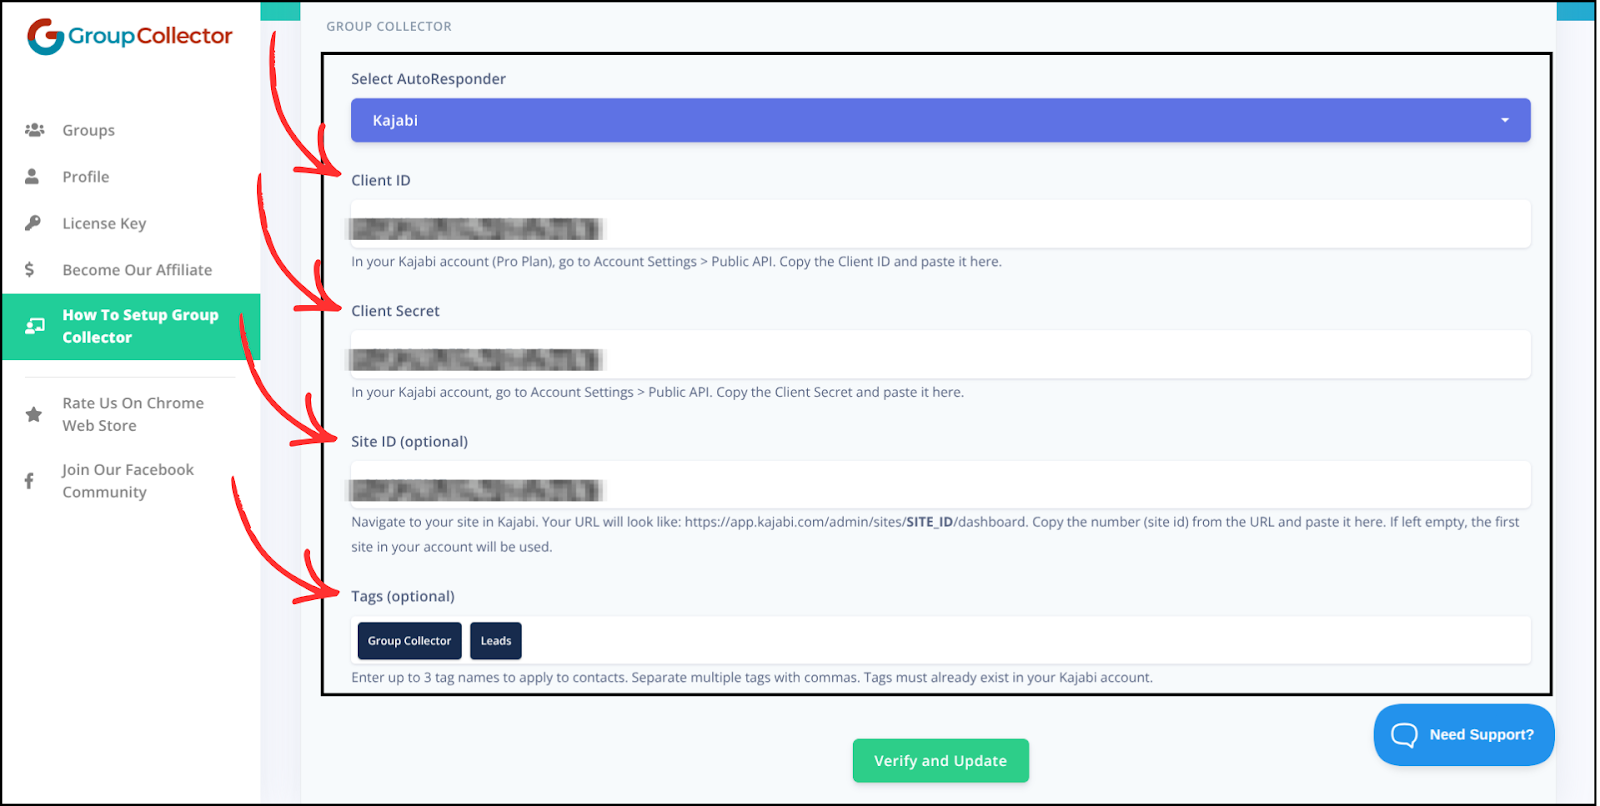
Now paste your Kajabi details into Group Collector:
- Client ID → Paste Kajabi Client ID
- Client Secret → Paste Kajabi Client Secret
- Site ID (Optional) → Paste Site ID
-
Tags (Optional) → Paste tag names (Use commas for multiple tags). Make sure the tag already exists in your Kajabi account

Double-check all values to avoid errors.
Step 6: Verify and Save the Integration
- Click Verify & Update
-
Wait for confirmation

Kajabi is now successfully connected as an autoresponder in Group Collector.

Final Result: What Happens After Integration
Once Kajabi is connected:
- Approved Facebook group members sync automatically
- Leads are added to Kajabi Contacts
- Tags are applied instantly (if added)
- Contacts are ready for email campaigns, offers, and automations
- No CSV uploads or manual data entry
Common Mistakes to Avoid
- Using the wrong Client ID or Client Secret
- Copying extra spaces while pasting credentials
- Forgetting to save after verification
- Deleting tags used in integration
- Not testing with a sample approved member
Best Practices
- Use unique tags for each group or campaign
- Test with one approved member first
- Keep API credentials secure
- Review integrations periodically
- Use tags to trigger Kajabi automations