How to Connect Group Collector with EmailOctopus
EmailOctopus is a simple, affordable email marketing tool that helps you grow your audience and send beautiful campaigns. Integrating EmailOctopus with Group Collector allows you to automatically sync new Facebook group members to your email lists.
To complete this integration, you will need:
- EmailOctopus API Key
- List ID
This guide will show you how to get both.
Before starting, make sure you have:
- An active EmailOctopus account
- A list created in EmailOctopus
- A connected Facebook group in Group Collector
Step 1: Get Your API Key from EmailOctopus
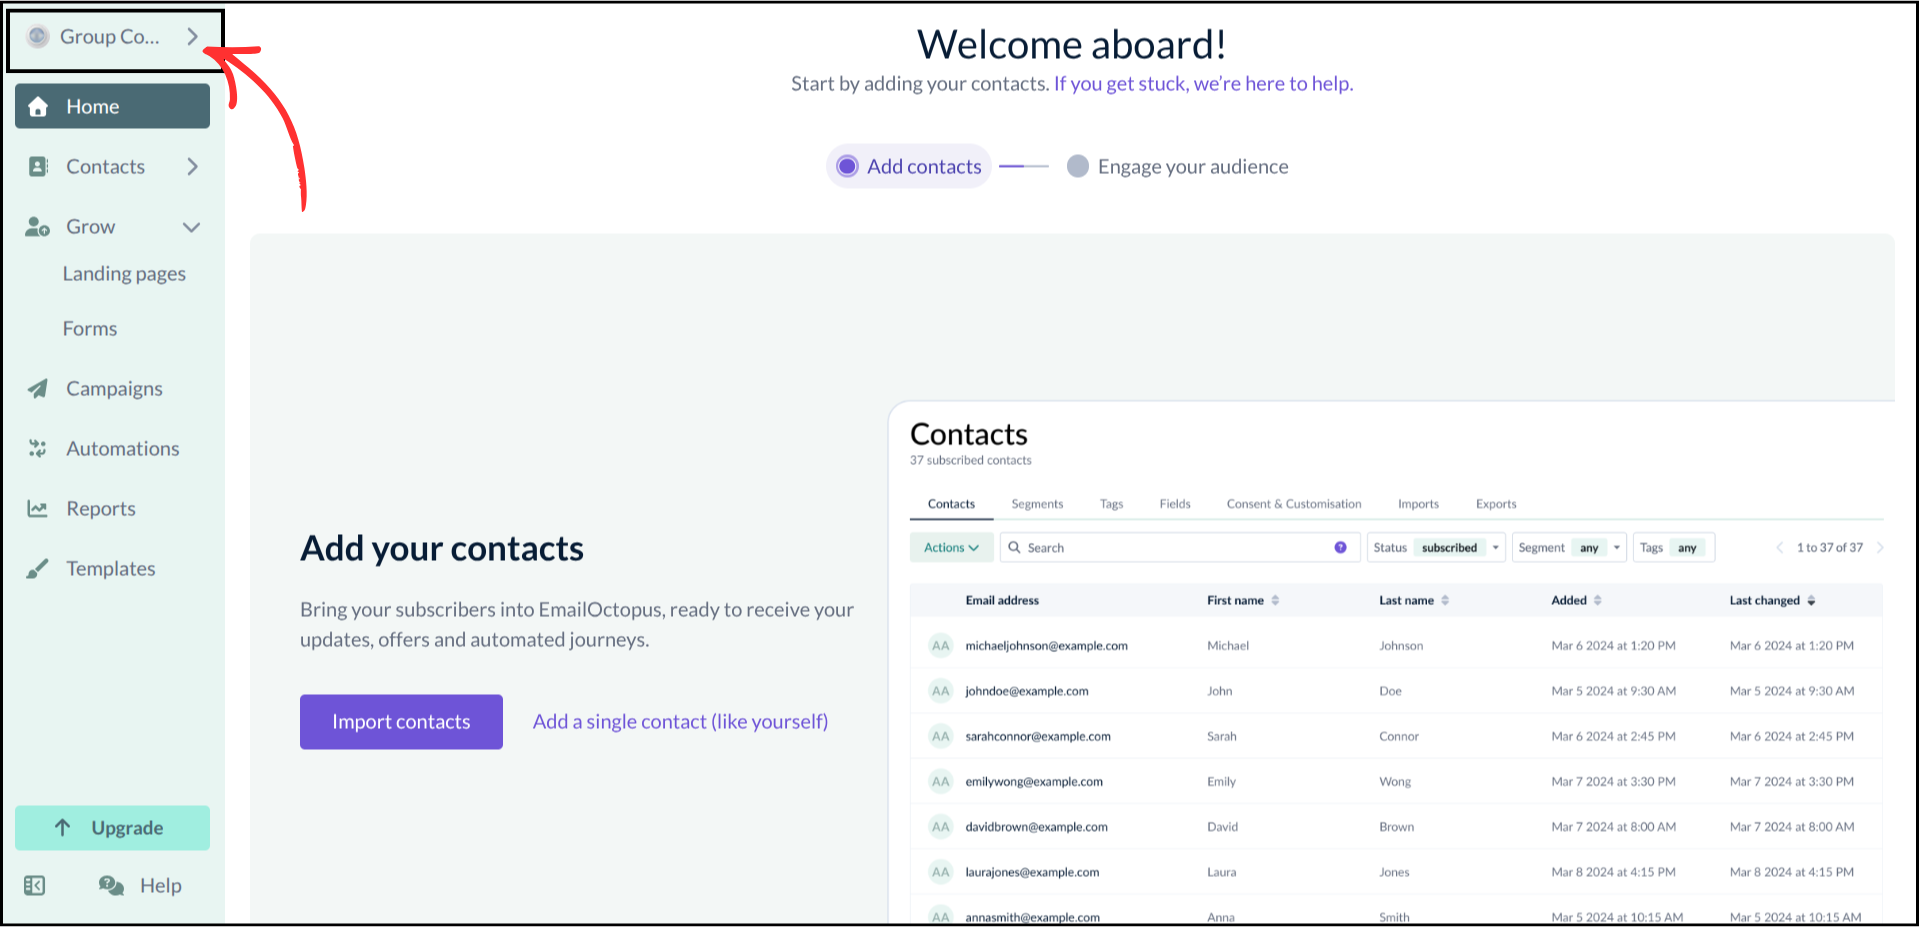
- Log in to your EmailOctopus account
-
Click your profile name in the top-left corner to open the dropdown menu
-
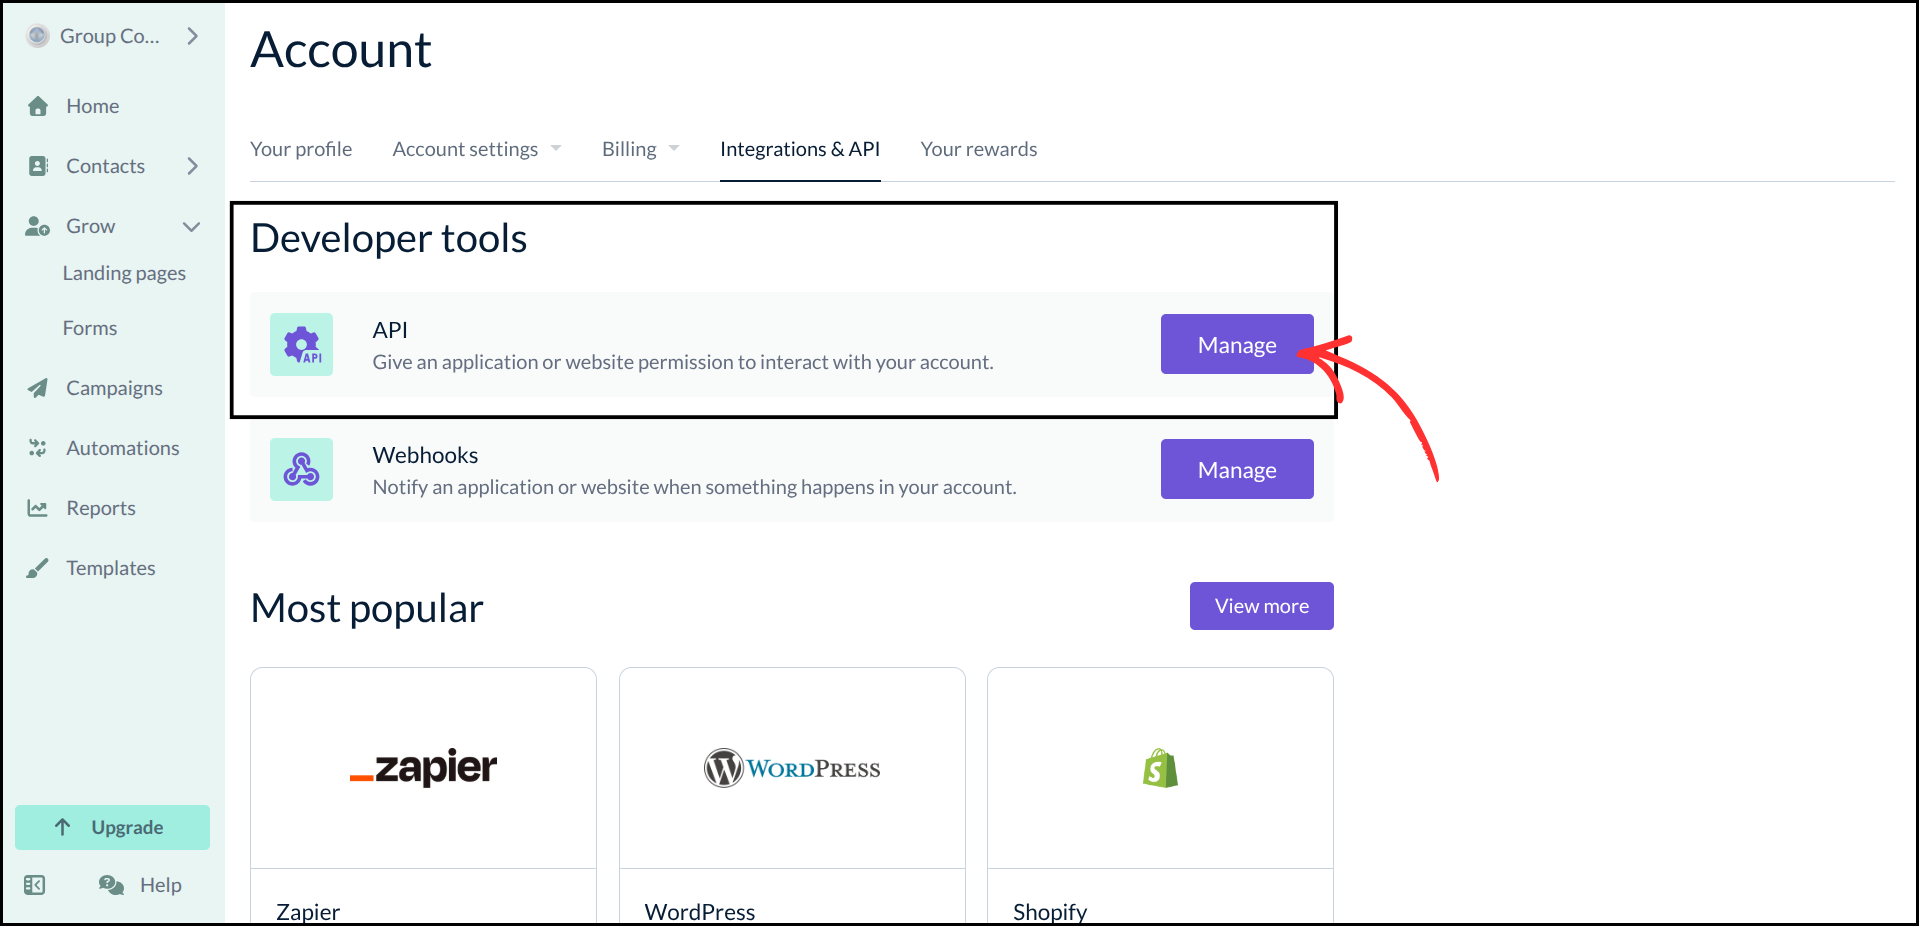
Select Integrations & API

-
Under Developer tools, click Manage next to API
-
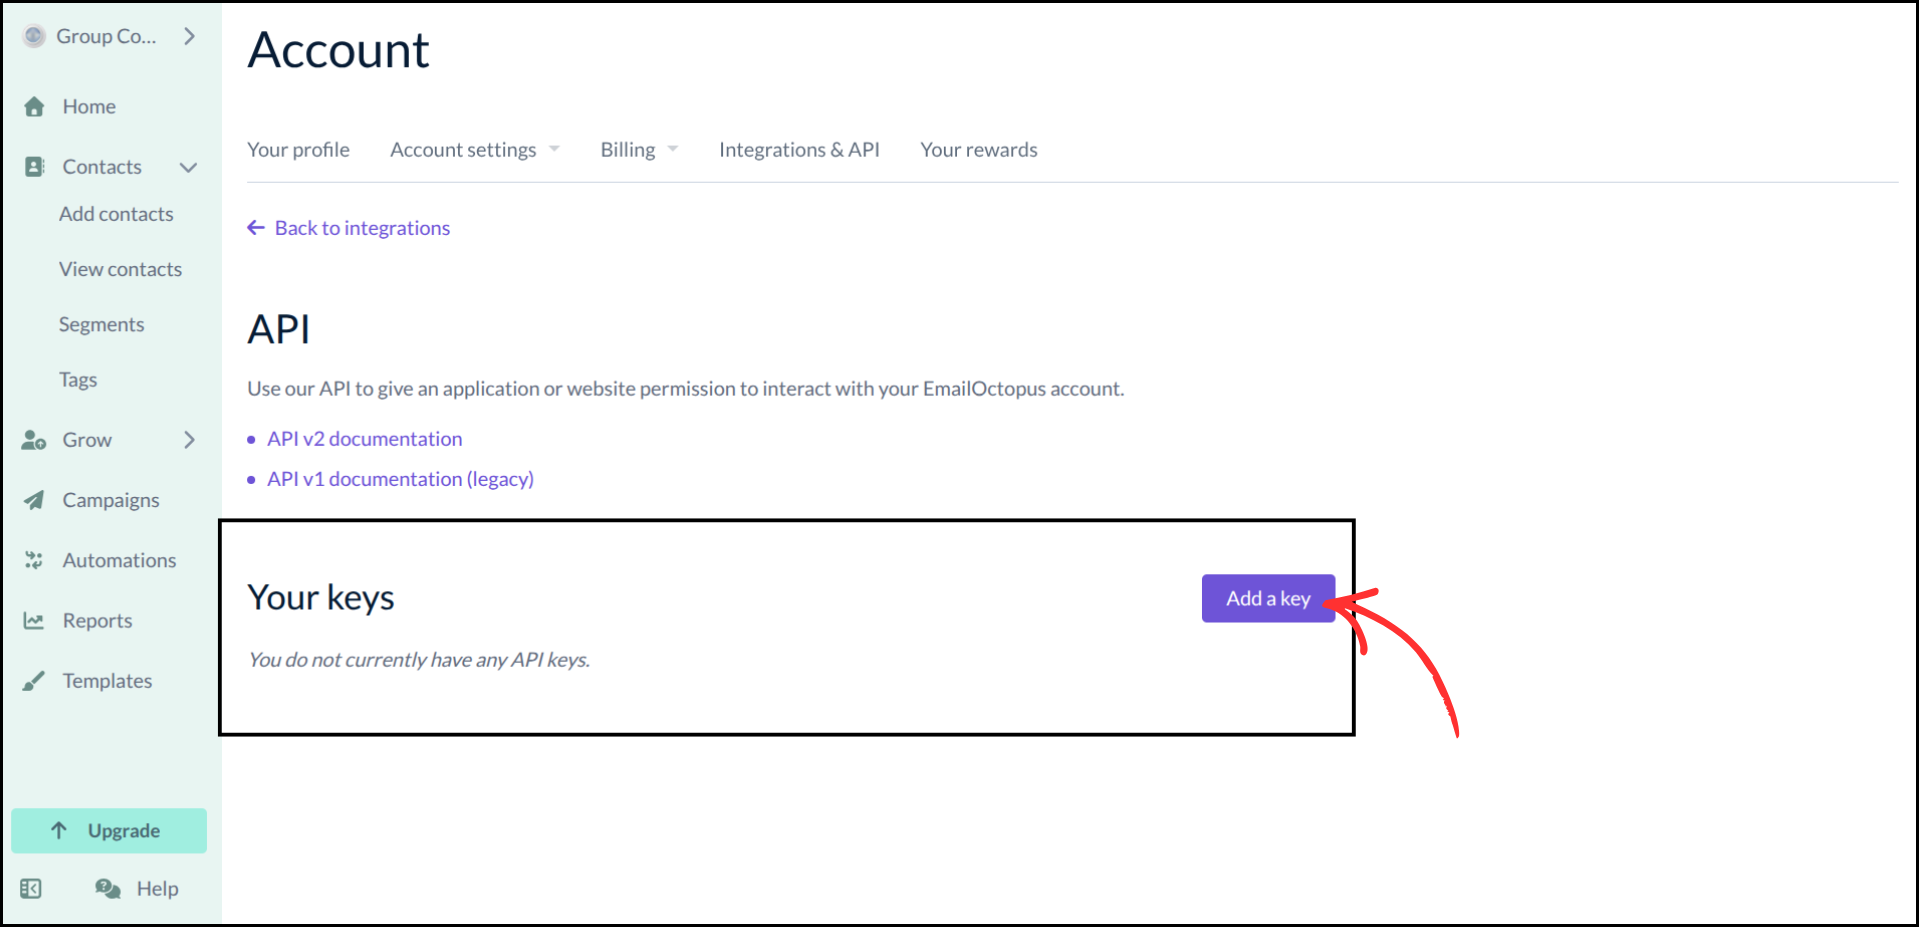
Click Add a key
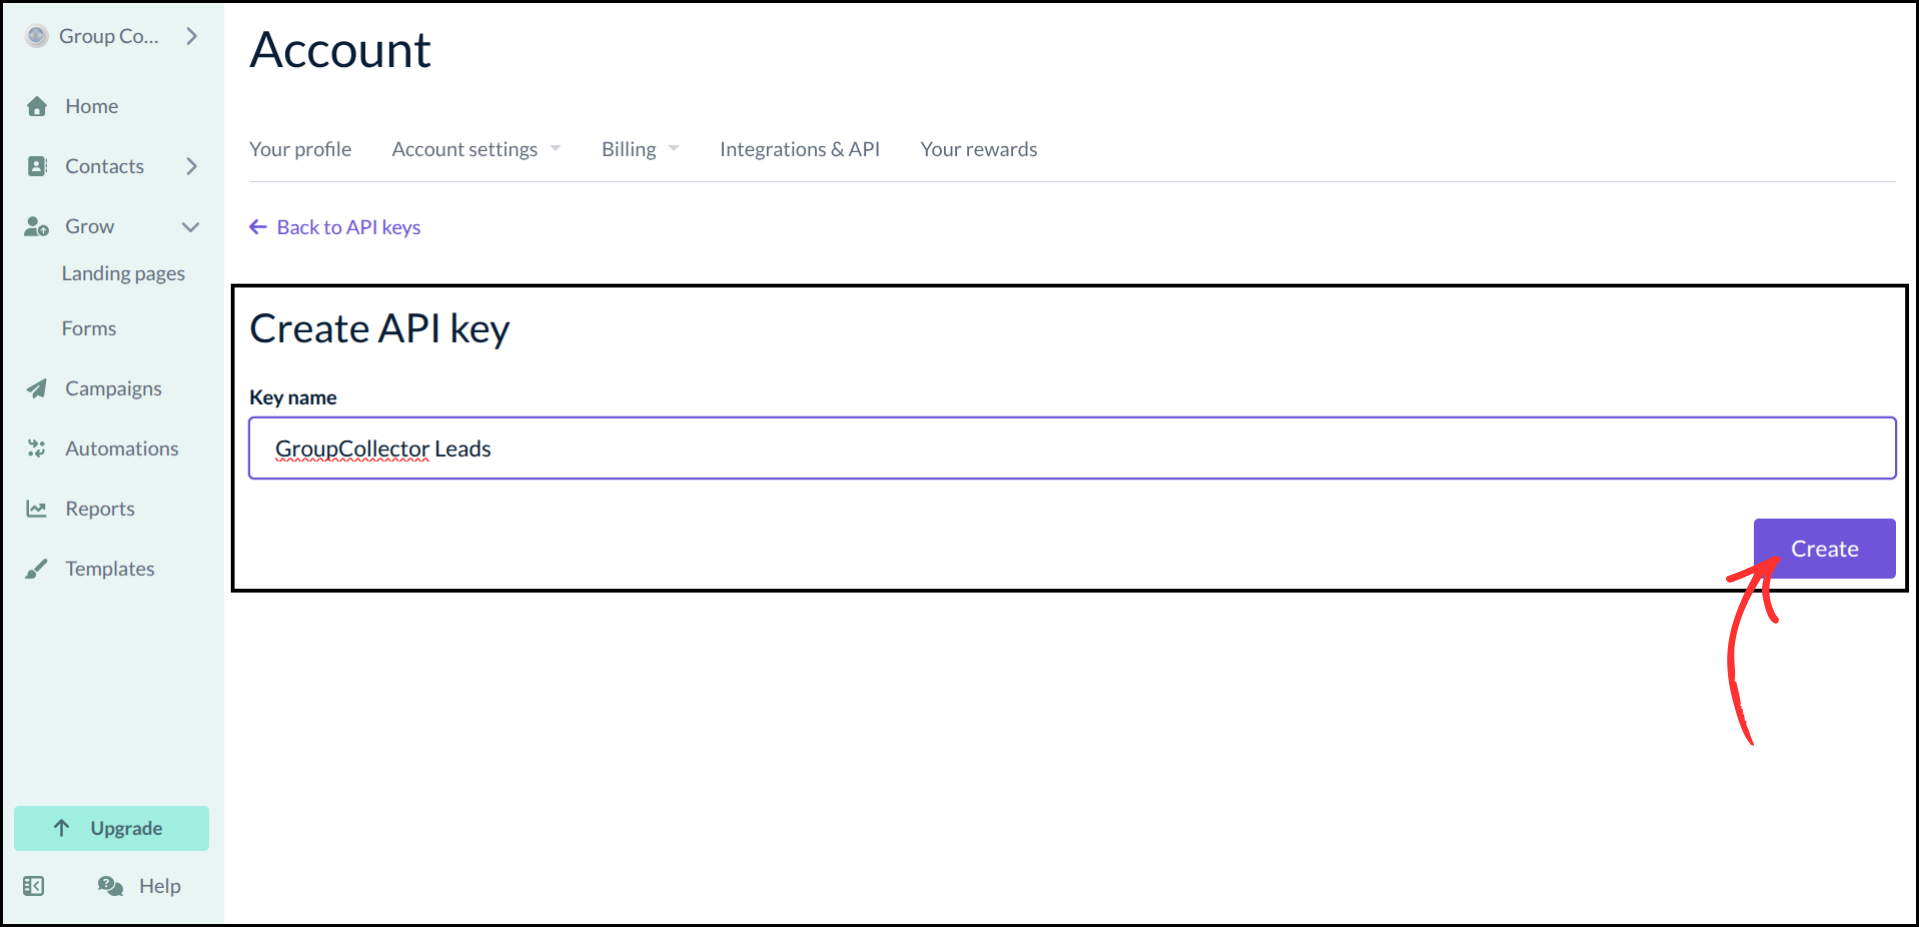
- Enter a name for the key (Example: GroupCollector Leads)
-
Click Create
-
Your API key will be displayed — click Copy and save it securely
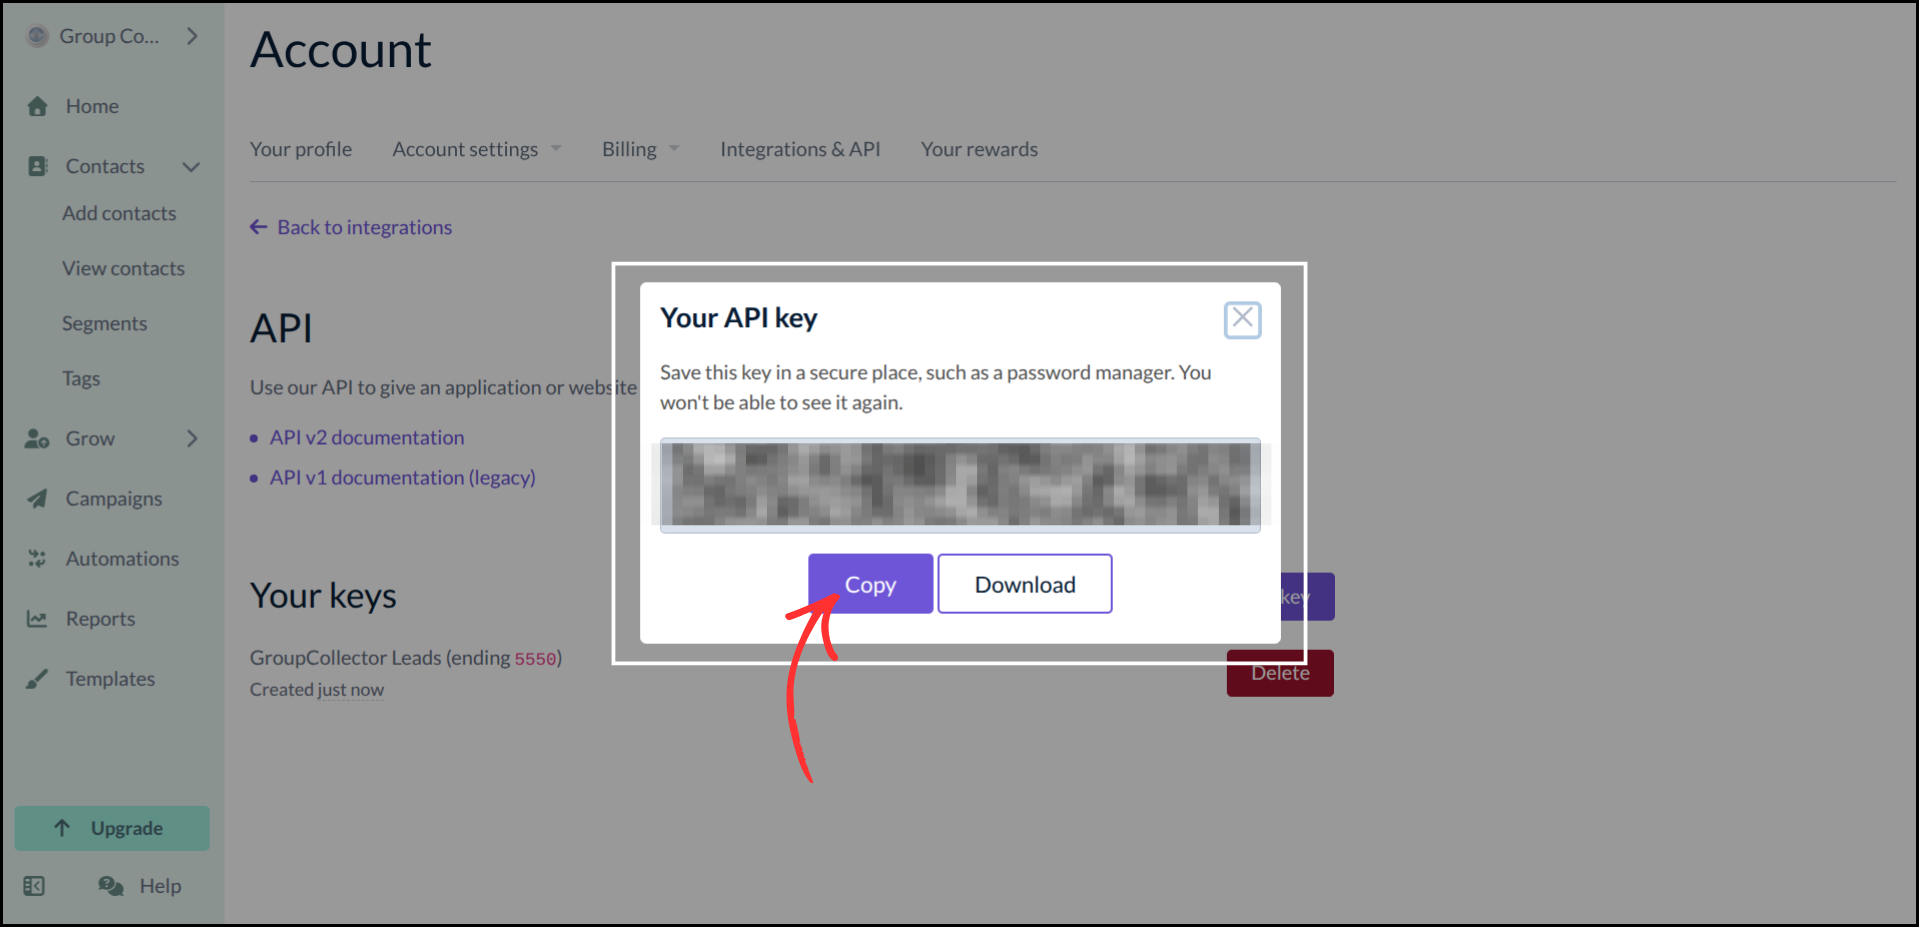


Important: Store your API key securely. You won't be able to see it again after closing the dialog.
Step 2: Get Your List ID from EmailOctopus
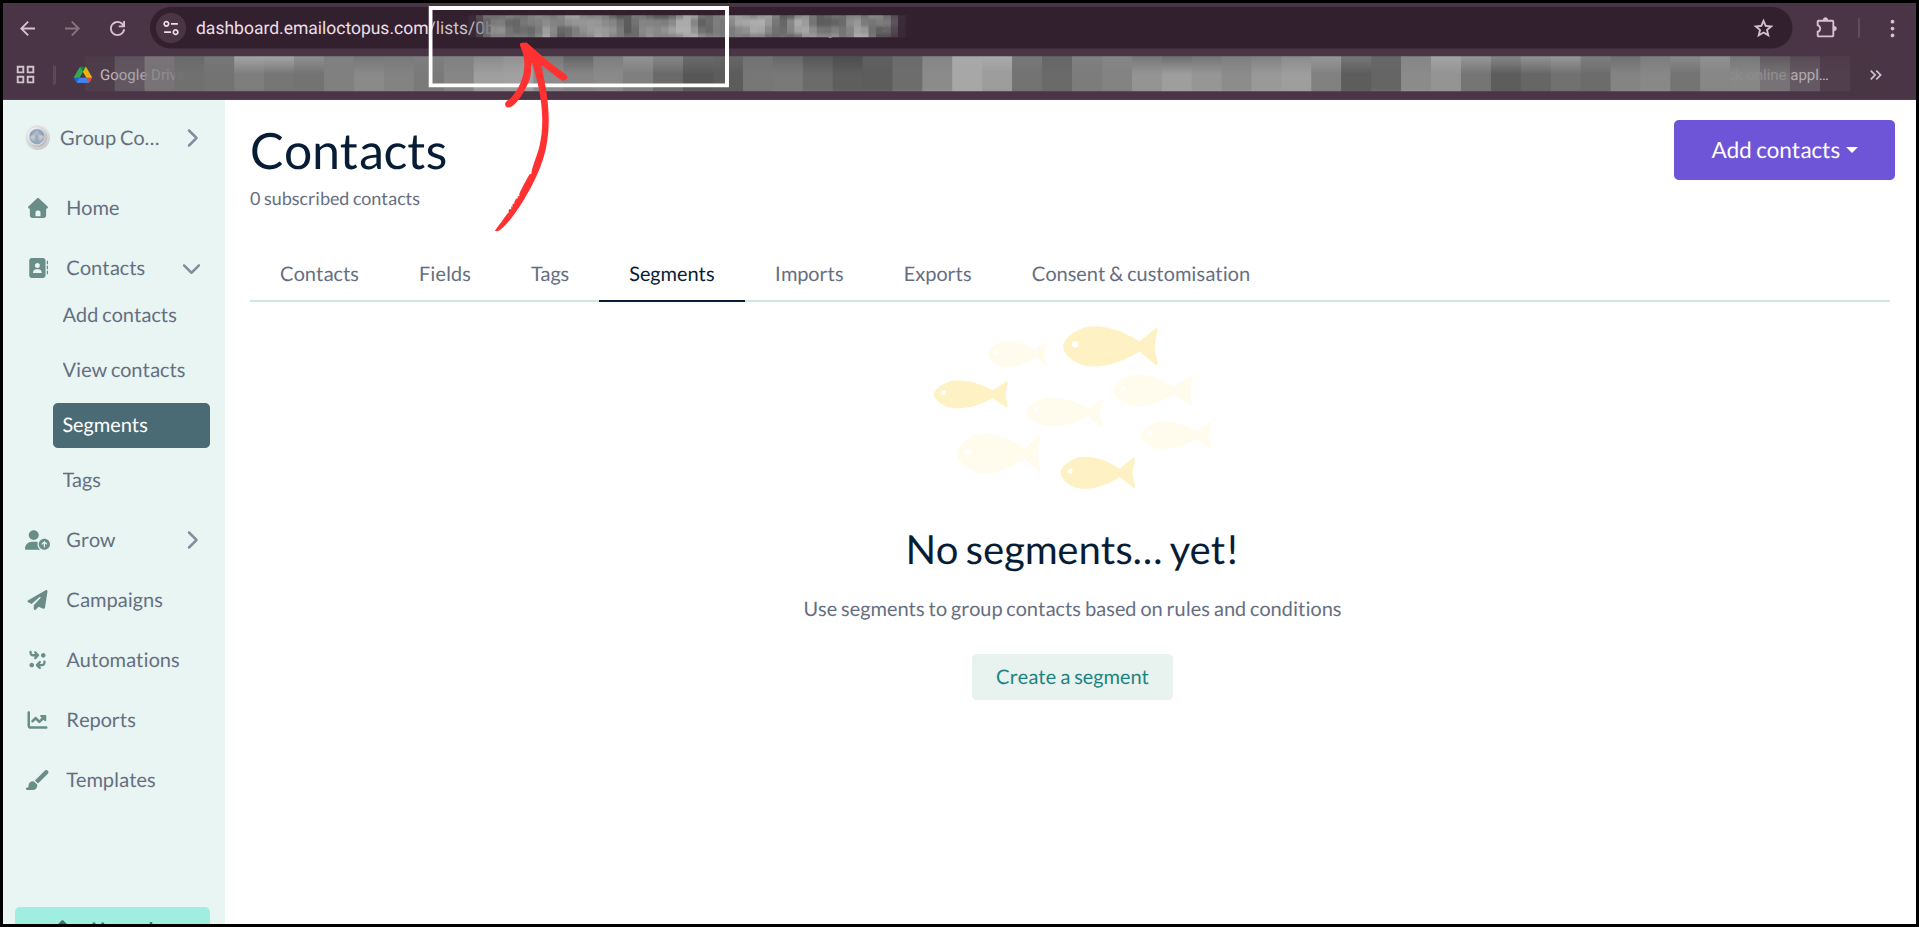
- In your EmailOctopus dashboard, go to Contacts in the left sidebar
- Click on the list you want to connect with Group Collector
- Look at the browser URL — it will look like: https://dashboard.emailoctopus.com/lists/YOUR_LIST_ID
-
Copy only the List ID from the URL (the part after /lists/)

Step 3: Add EmailOctopus as an Autoresponder in Group Collector
- Log in to your Group Collector dashboard
- Click Add button for the Autoresponder
-
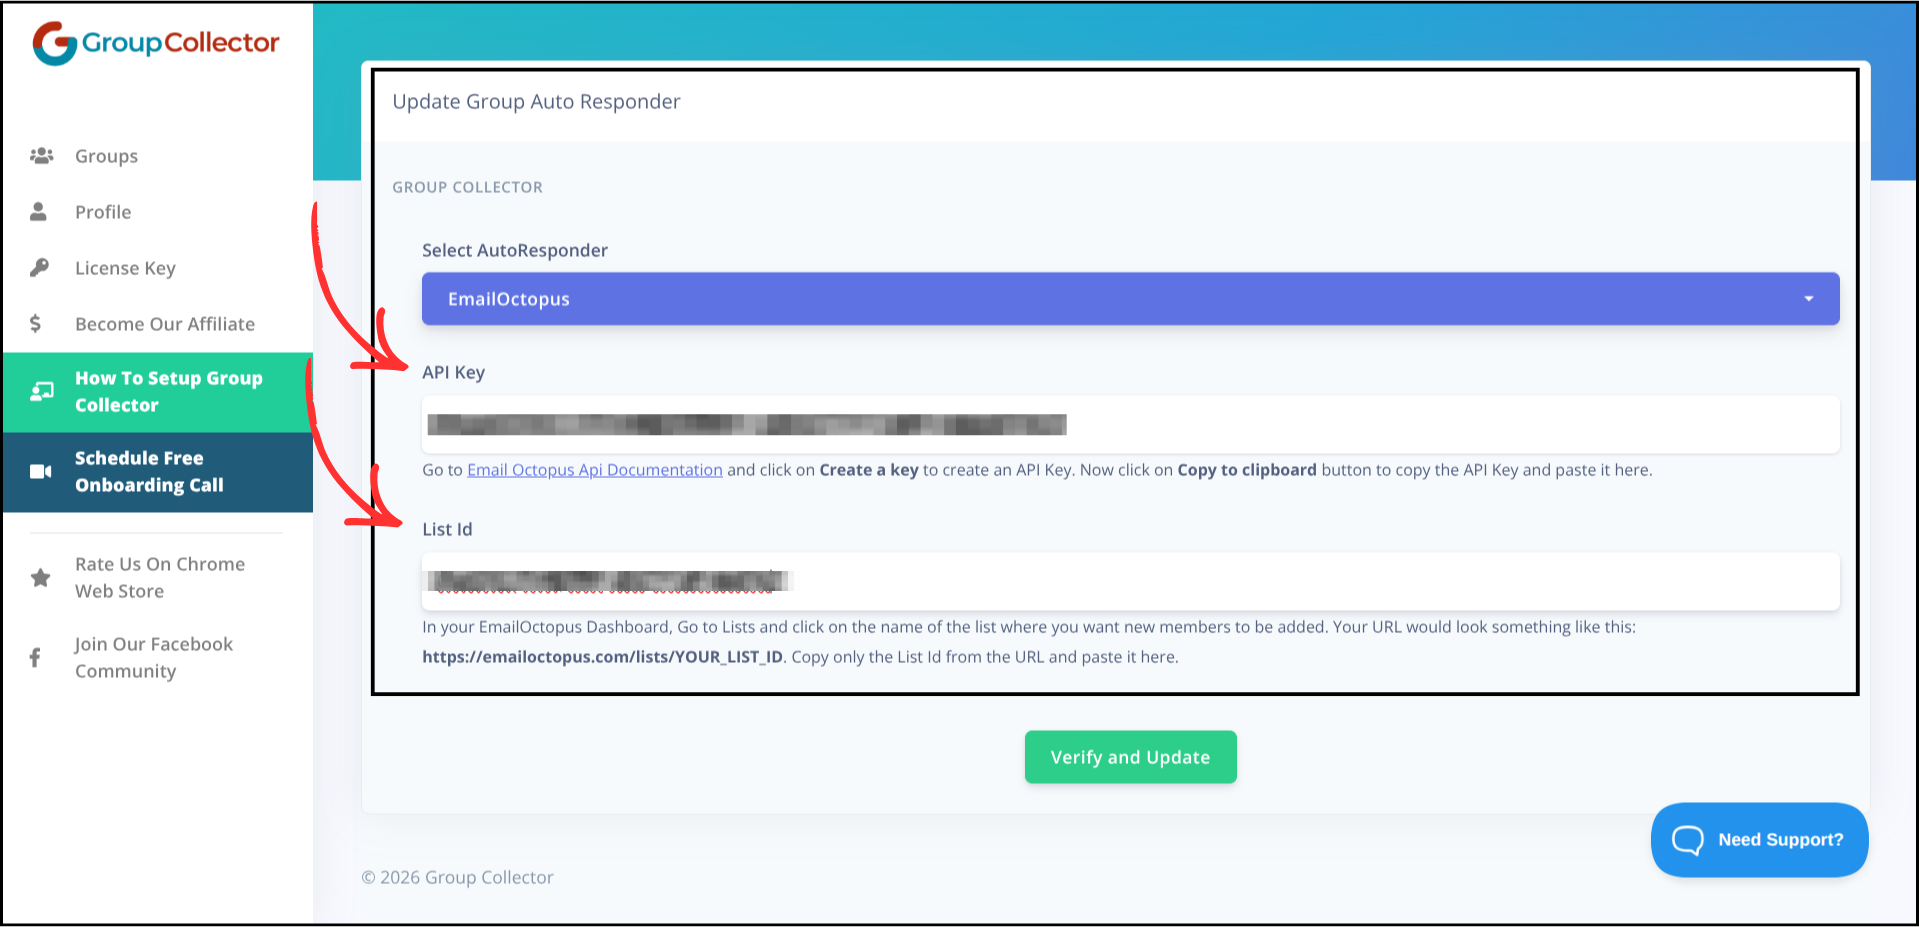
Select EmailOctopus from the autoresponder list


Step 4: Enter Your EmailOctopus Credentials
- Paste your API Key into the API Key field
-
Paste your List ID into the List Id field
-
Click Verify and Update
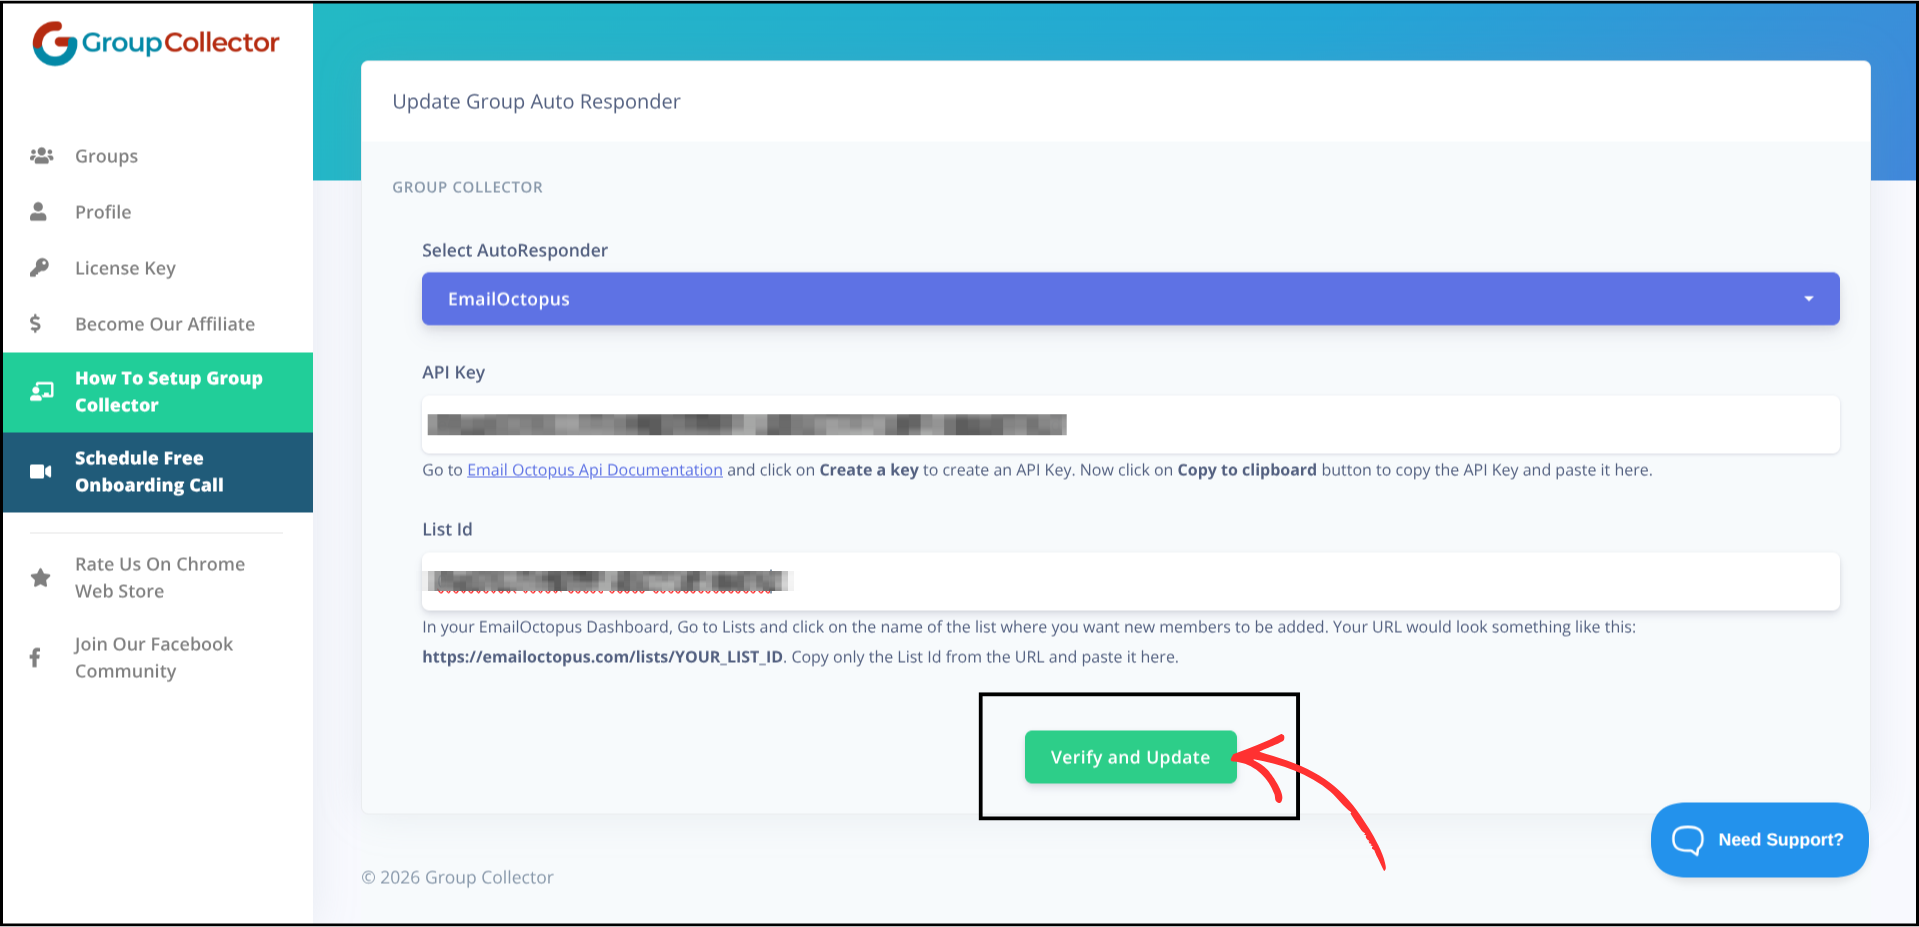


If everything is correct, you'll see a success message confirming the connection.

Final Result
Once the integration is complete:
- Approved Facebook group members are automatically added to your EmailOctopus list
- Leads sync in real time
- Contacts are ready for email campaigns and automations
- No manual CSV import is required
- Data is also stored in Google Sheets for backup and tracking
Common Mistakes to Avoid
- Copying the wrong List ID — make sure you copy only the ID part, not the full URL
- Missing or pasting an incorrect API Key
- Not saving the API key before closing the dialog
- Closing the browser before verification completes
- Not testing the integration with a sample member
Best Practices
- Test the integration with a sample approved member
- Use separate lists for different Facebook groups
- Keep API Keys stored securely in a password manager
- Review integrations periodically to ensure they are working correctly
- Set up email automations in EmailOctopus to welcome new subscribers