How to Connect Group Collector with AWeber
If you want your Facebook group members to be automatically added to your AWeber email list, you need to connect AWeber as an autoresponder inside Group Collector.
This integration ensures that every approved group member is captured by Group Collector, saved in Google Sheets, added to AWeber, and ready for email campaigns or automations.
To complete this integration, you will need:
- AWeber Access Token (fetched automatically)
- AWeber Unique List ID
This guide will show you how to get both.
Before you start, make sure you have:
- An active AWeber account
- A list created inside AWeber
- Your Facebook group is connected to Group Collector
- Membership questions already set up
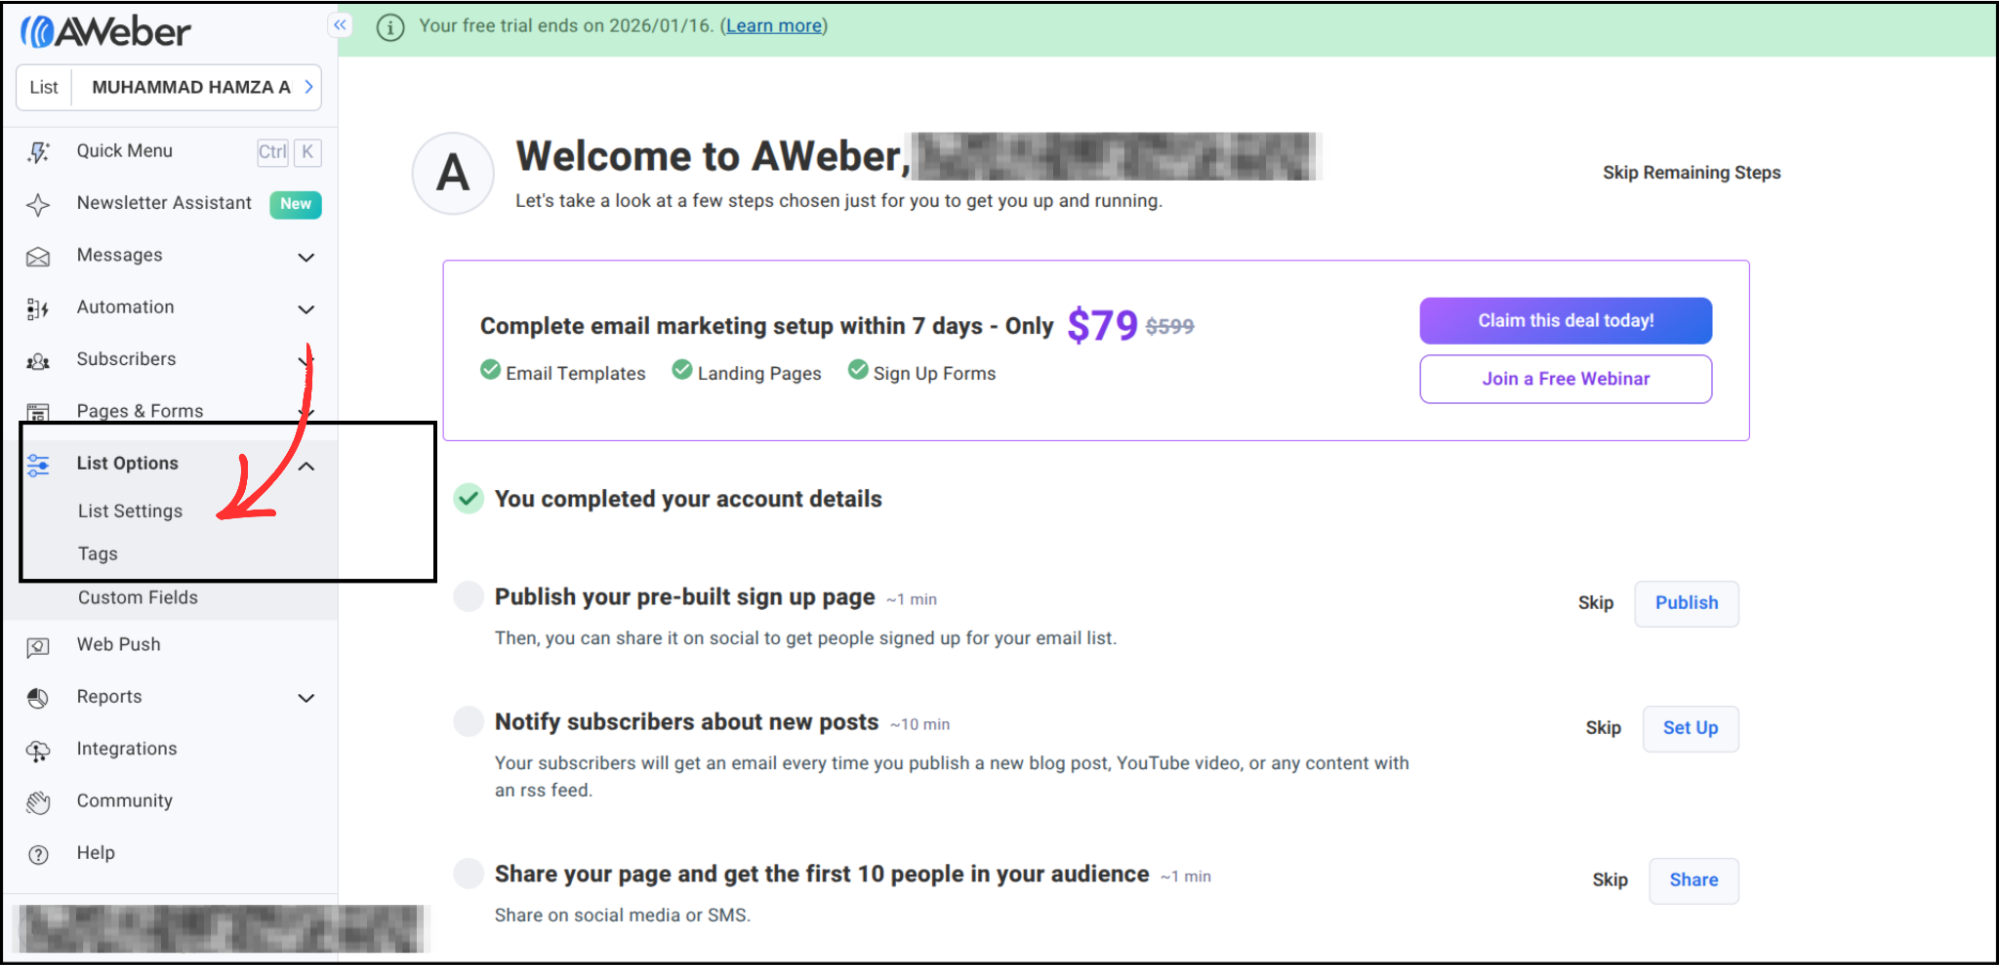
Step 1: Find Your AWeber Unique List ID
Group Collector requires the Unique List ID, not the list name.
- Log in to your AWeber dashboard.
-
Look at the left panel. Under List Options, click List Settings.
-
The Unique List ID will appear on the page.

- Copy the Unique List ID and save it in Notepad (Windows) or Notes (Mac).


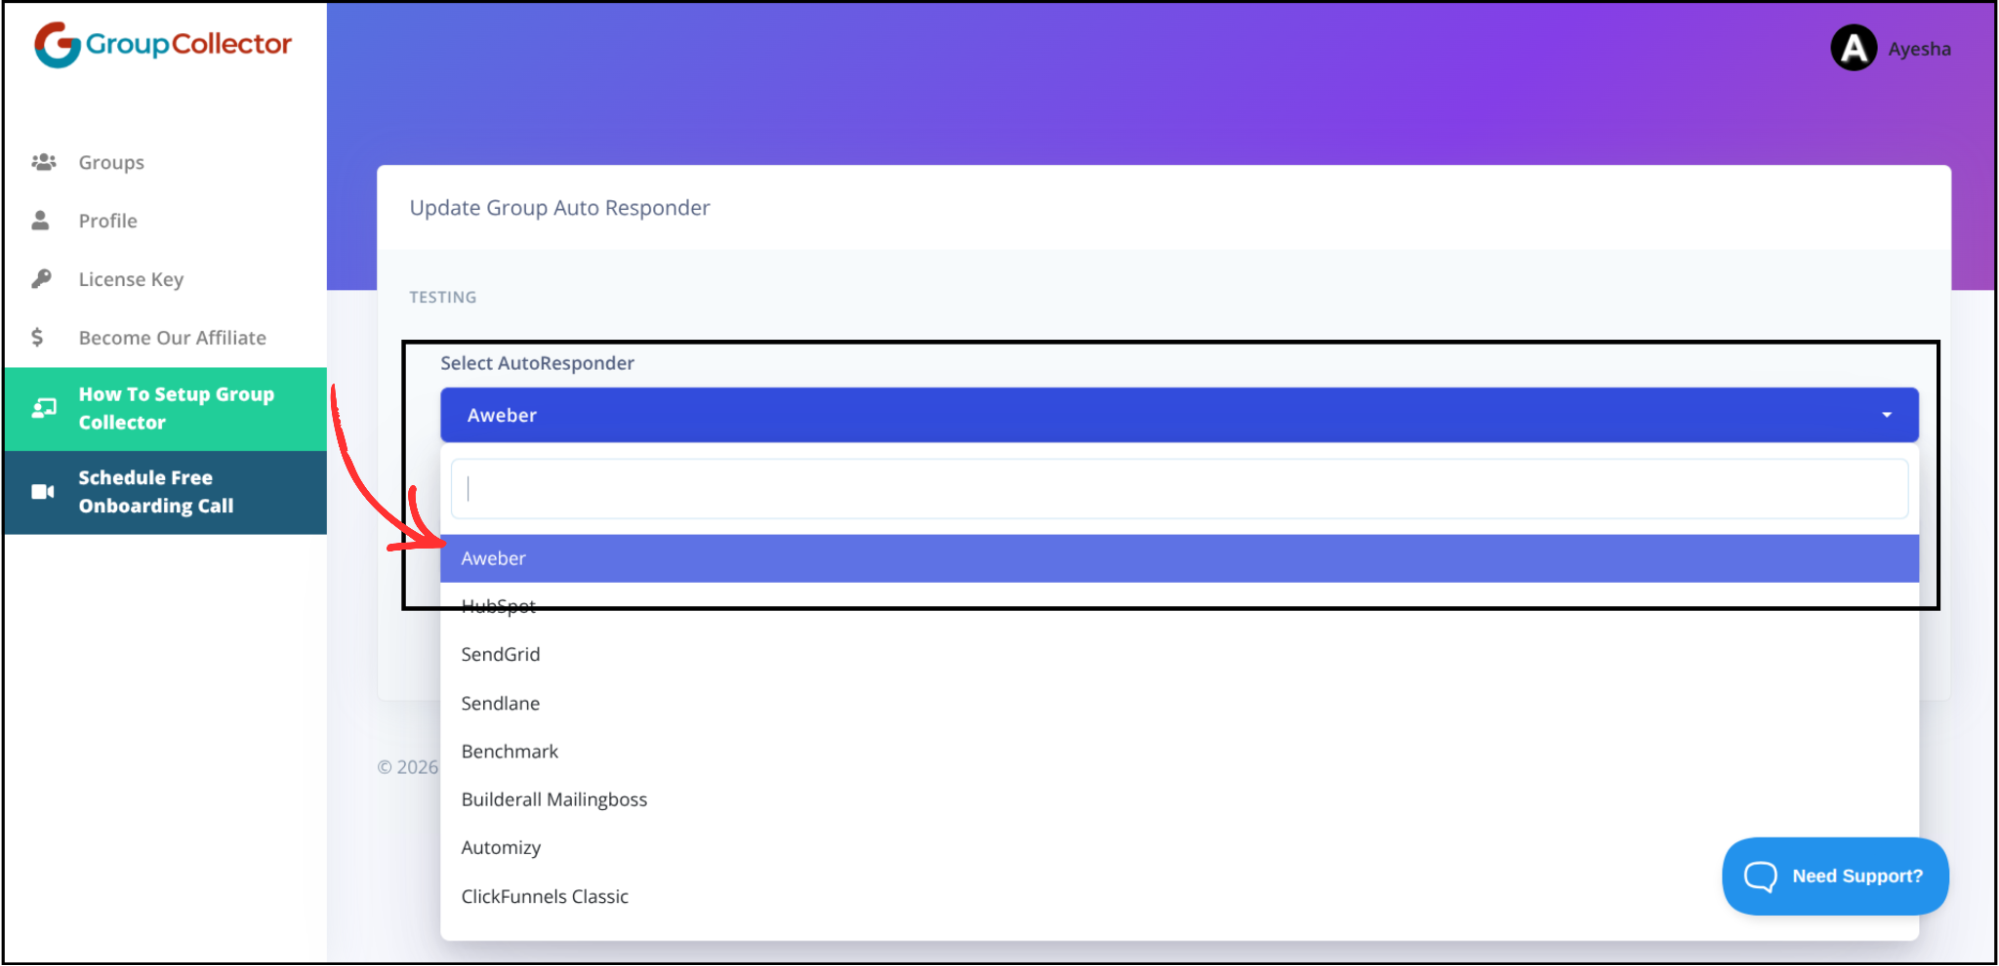
Step 2: Get the AWeber Access Token (Allow Access)
The access token is automatically fetched when you allow access from Group Collector.
- Open the Group Collector dashboard.
-
Click the Add button for the Autoresponder.

-
Select Aweber from the dropdown list.
-
Click Get Aweber Access Token.
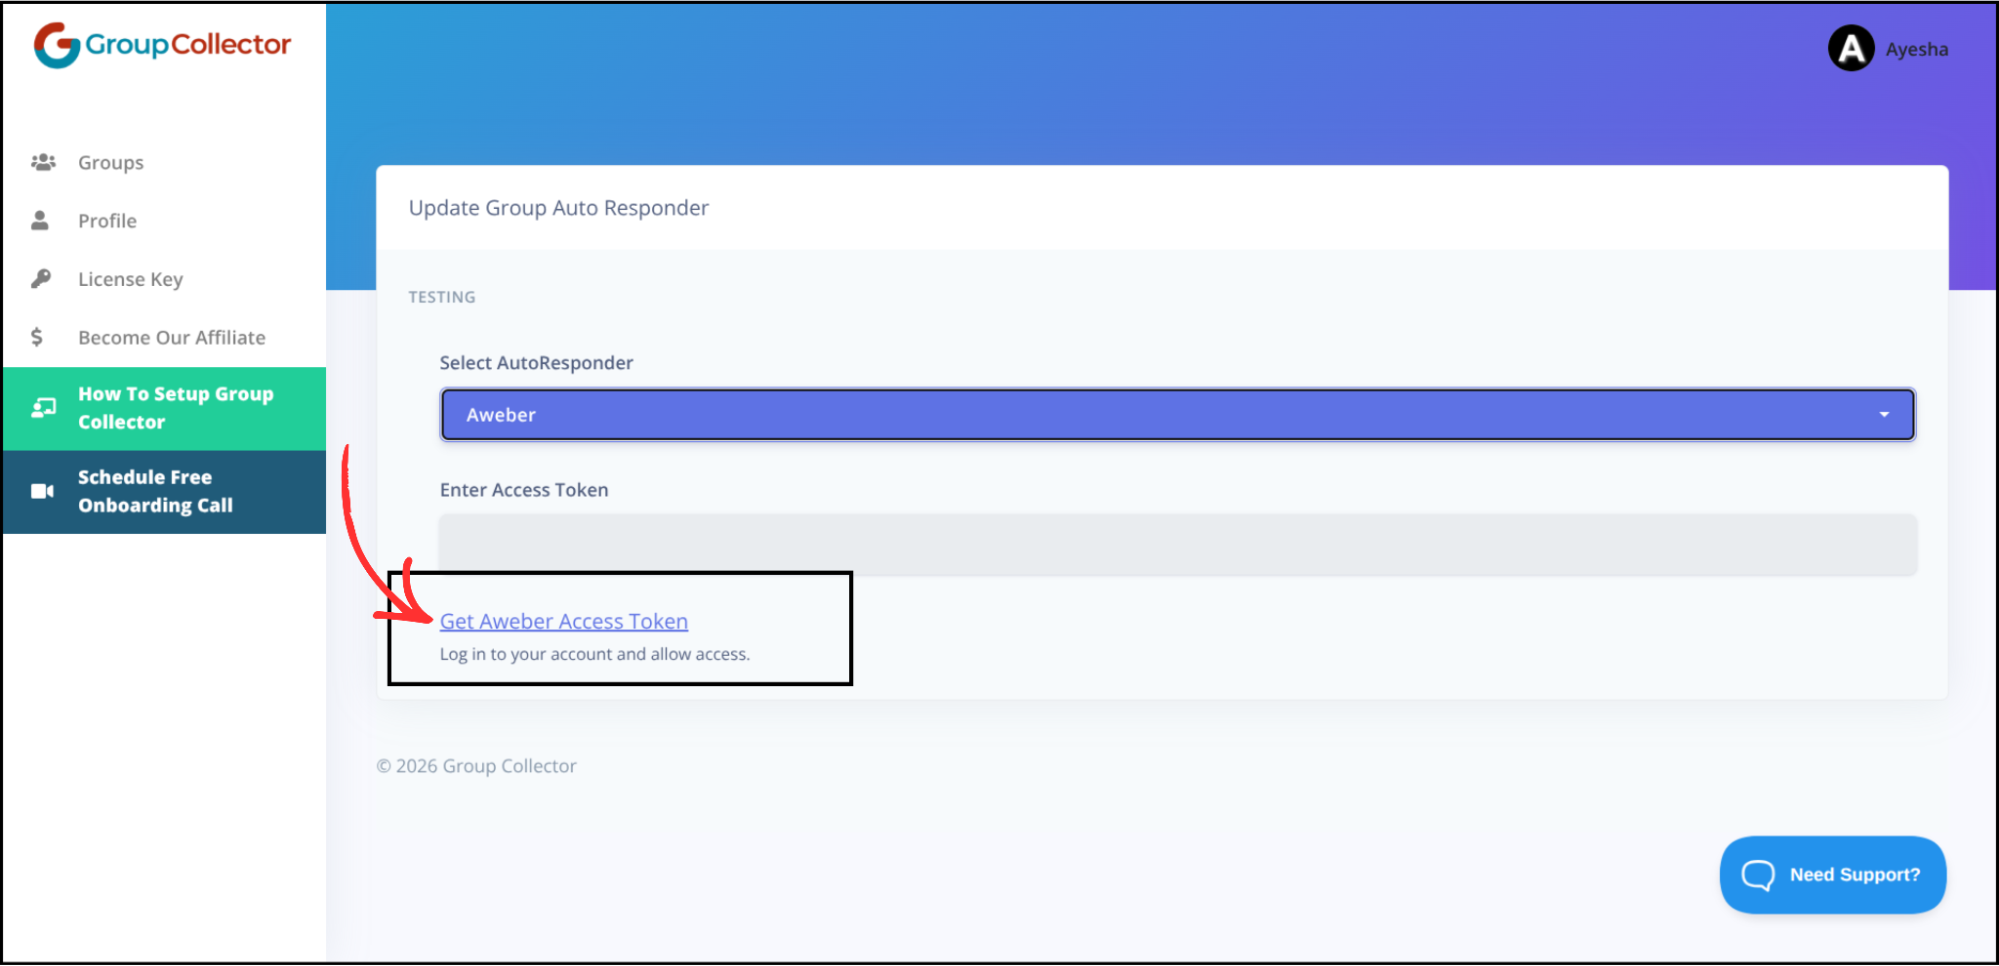
- Log in to your AWeber account.
-
Click Allow Access.
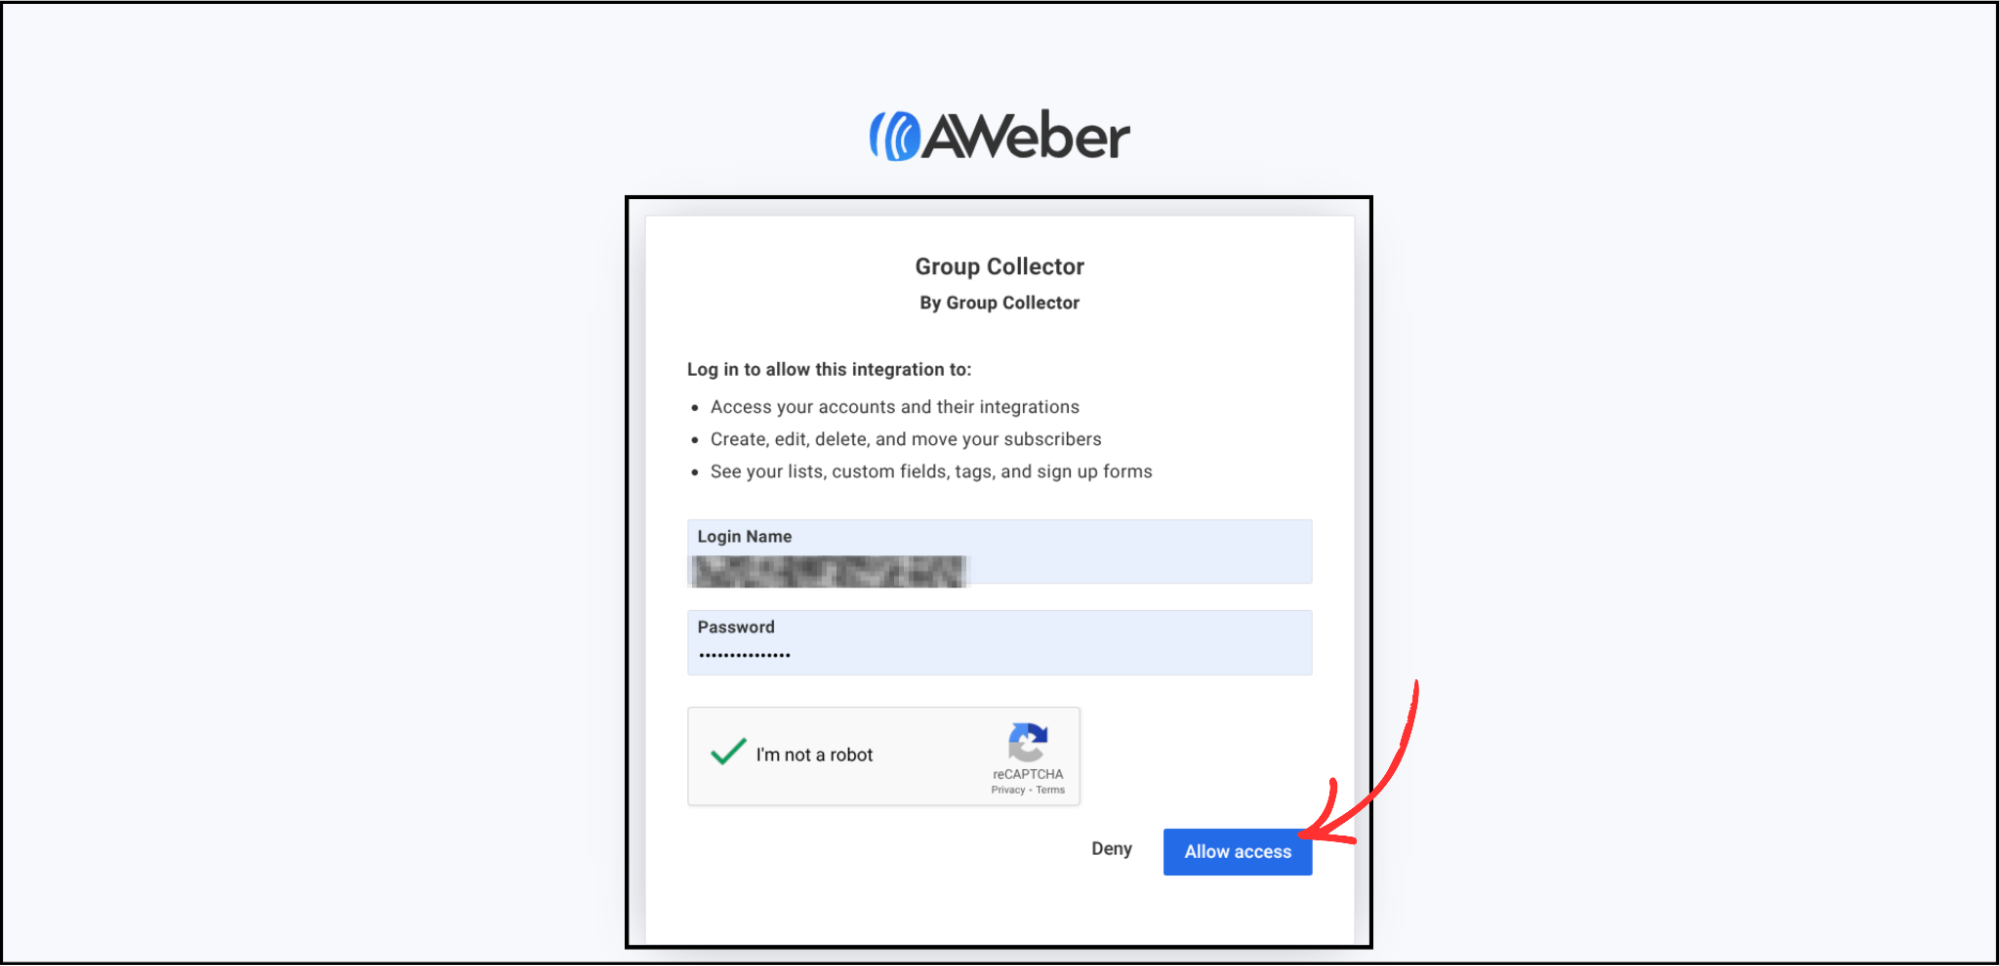
- Once approved, Group Collector will automatically fetch the access token. No manual API key is required.


Step 3: Enter AWeber Details in Group Collector
Go back to the Group Collector dashboard and enter the following details:
- Access Token — This is automatically fetched after allowing access.
- Unique List ID — Paste the copied ID.
- Tags (Optional) — Enter the tags to be applied to contacts. Separate multiple tags with a comma.

Step 4: Verify and Save the Integration
- Click Verify & Update.
-
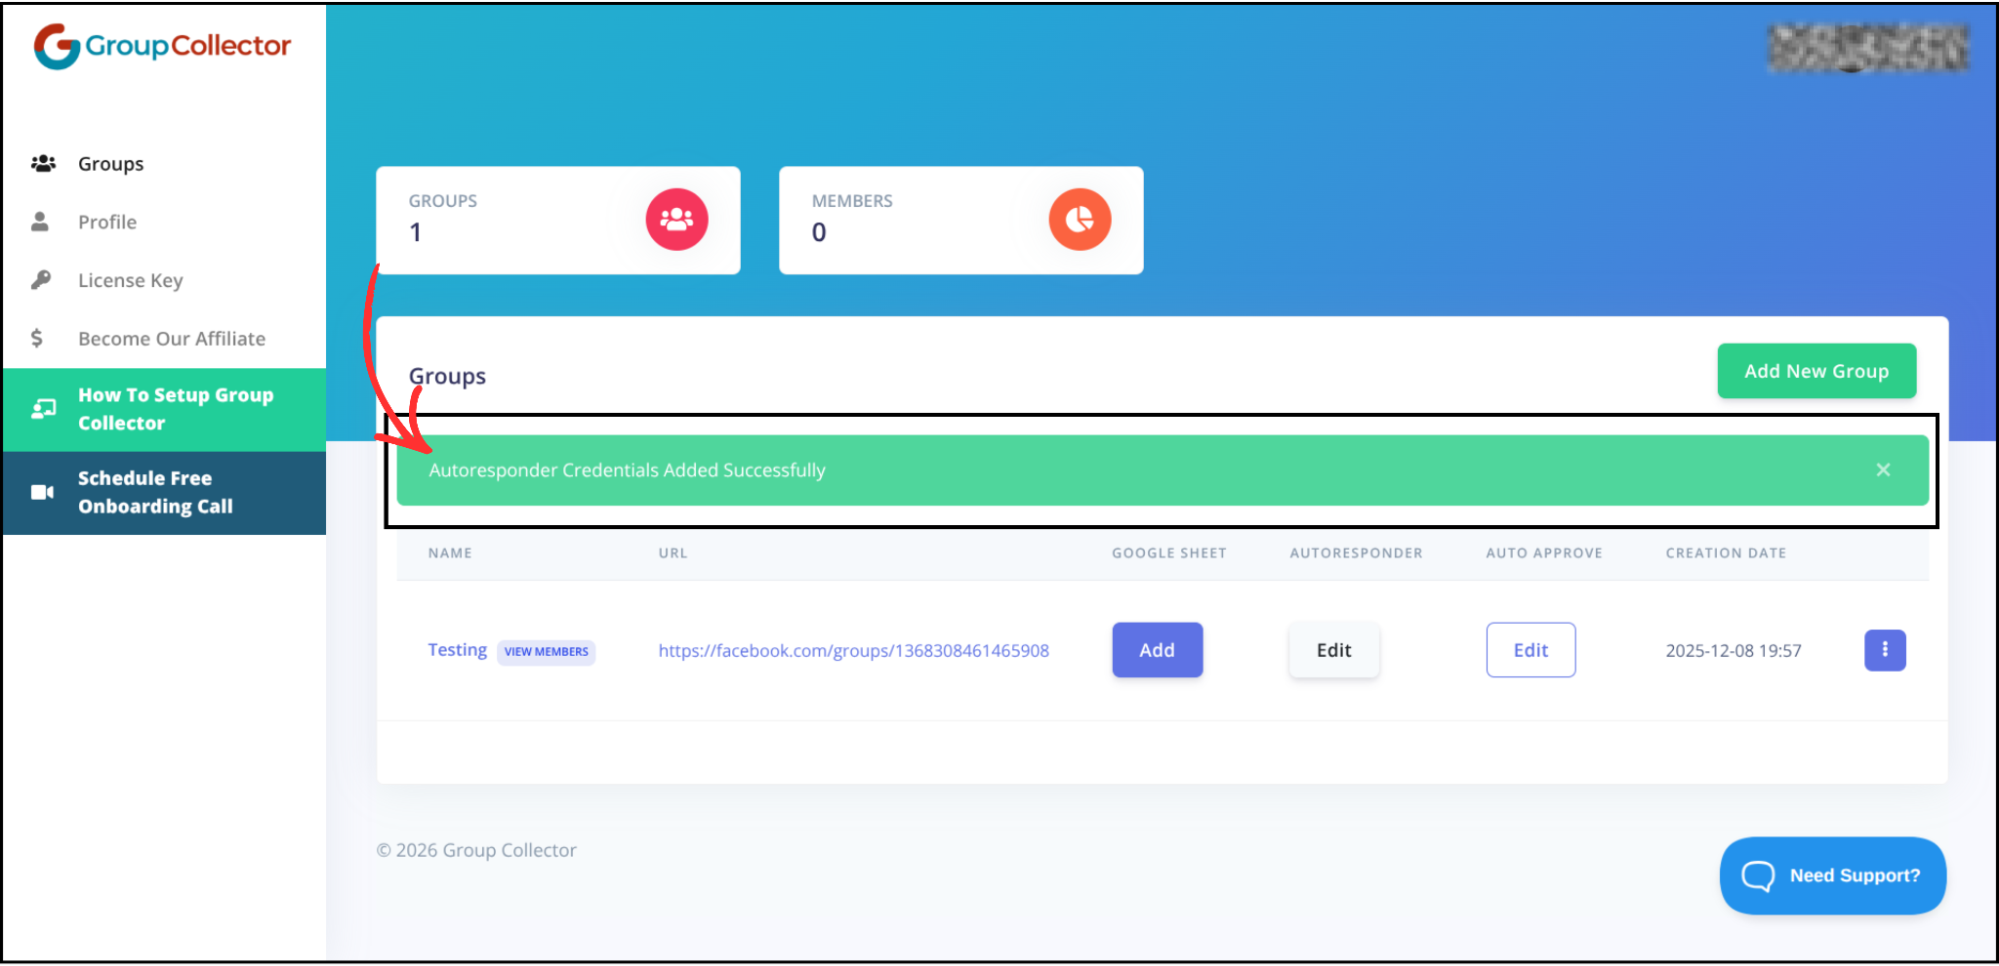
AWeber has been successfully added as an autoresponder in Group Collector.

Final Result
Once the integration is complete:
- Every approved member of your Facebook group is automatically added to your AWeber list.
- Emails and membership answers are synced in real time.
- Contacts appear inside your selected AWeber list.
- Subscribers are ready for email campaigns and automations.
- No manual CSV import is required.
Common Mistakes to Avoid
- Using the list name instead of the Unique List ID.
- Not clicking Allow Access on the AWeber authorization page.
- Copying extra spaces while pasting the List ID.
- Revoking access from AWeber after the setup is complete.
- Skipping the verification step.
Best Practices
- Always use the Unique List ID, not the list name.
- Test with a sample approved member to verify the connection.
- Create separate lists for different Facebook groups.
- Periodically check that the integration is still active.
- Keep your membership questions aligned with your email strategy.